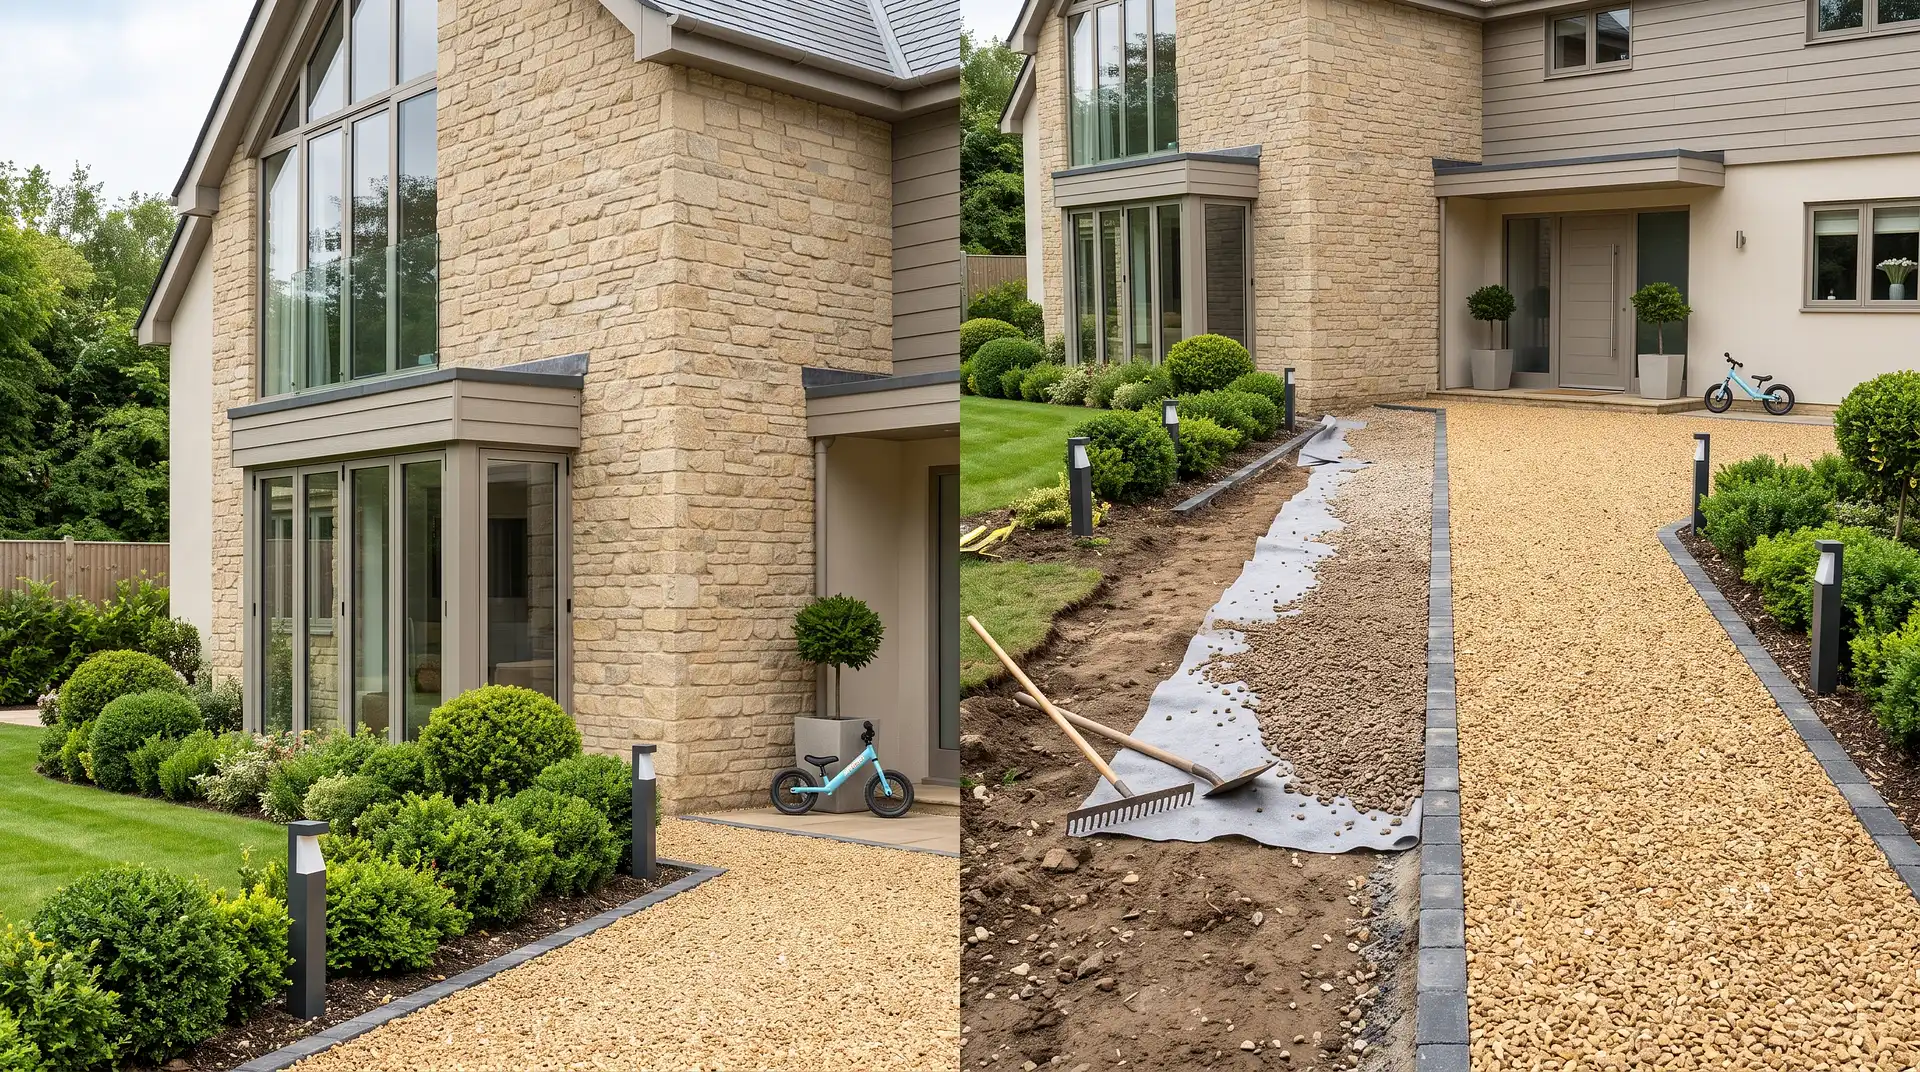
How to Lay a Gravel Driveway
9 August 2026
How to Lay a Gravel Driveway (Properly, Step by Step)
Gravel driveways fail for a small, predictable set of reasons, almost always the sub-base, the membrane, or the gravel depth being wrong, not the gravel itself. Get those three things right and a gravel driveway is genuinely one of the more forgiving DIY landscaping projects available. Get any one of them wrong and you'll be looking at ruts, sunken patches, and weeds within a year, regardless of how good the gravel itself was.
The Three Layers, and Why Order Matters
A properly built gravel driveway is really three separate layers working together: a compacted sub-base that bears the actual weight of vehicles, a geotextile membrane that keeps the sub-base and the ground beneath it from mixing, and a relatively thin decorative gravel layer on top that does no structural work at all. Understanding that the gravel itself is purely cosmetic, and the sub-base is what actually holds a car's weight, changes how you think about every step below.
Correcting a Common Mistake: Where the Membrane Actually Goes
This trips up a lot of DIYers, and it's worth getting right before you buy anything. The membrane's job is to stop fine soil particles migrating up into the clean sub-base stone, which would otherwise ruin its drainage and load-bearing performance over time. That means it goes directly on the excavated soil, before the sub-base, not on top of the compacted sub-base just before the gravel layer, which is a genuine and common misconception. Placing it under the gravel instead of under the sub-base does very little to protect the driveway's structural performance, since the sub-base is what actually needs protecting from the soil beneath it.
What You Need
A spade, mattock, or mini digger for larger areas, for excavation.
Geotextile membrane, a woven type rated for ground stabilisation, not a cheap decorative weed-prevention fabric, which degrades within a year or two under a driveway's weight.
MOT Type 1 sub-base aggregate, the standard UK material for this layer, sold by the bulk bag or delivered loose for larger jobs.
Decorative gravel, ideally around 20mm in size, smaller sizes get picked up and stuck in car tyres, larger sizes can feel uncomfortable underfoot and harder to walk on.
A wacker plate or vibrating roller, essential for driveways, it's genuinely not possible to properly compact a sub-base by hand, and these typically cost £30 to £50 a day to hire.
Edging material, aluminium, timber sleepers, or brick, to contain the gravel and stop it migrating onto lawns or paths.
Step 1: Excavate
Remove turf, topsoil, and any roots or debris. For a driveway rather than a garden path, excavate to a minimum of 150mm, with many professional guides recommending 175 to 250mm depending on ground conditions and the vehicles using it. Topsoil depth varies considerably by site, sometimes 50 to 300mm, and you need to dig down into firm subsoil beneath it, since topsoil's poor load-bearing ability and tendency to hold water make it unsuitable as a foundation regardless of how deep it happens to be. Any soft or waterlogged patches found during excavation need digging out further and backfilling with compacted sub-base material, not left as they are.
Step 2: Lay the Geotextile Membrane
Roll the geotextile membrane out over the exposed, excavated soil, with overlapping joins where multiple sheets meet. This is the layer that stops the sub-base sinking into soft ground and being contaminated by soil migrating upward through it, which is exactly why it goes here rather than higher up in the structure.
Step 3: Install and Compact the Sub-Base
Add MOT Type 1 in layers rather than tipping the full depth in at once, a single thick layer won't compact properly all the way through, and the bottom will stay loose regardless of how long you run the wacker plate over the top. For a standard 150mm sub-base depth, two layers of roughly 75mm each, compacted individually, gives a genuinely stable result. Slope the finished sub-base slightly away from the house or garage to help with water runoff. As a rough materials guide, one bulk bag of MOT Type 1 covers approximately 10m² at 50mm depth, scale up accordingly for your actual sub-base depth.
Step 4: Fit the Edging
Install your chosen edging, aluminium, timber sleepers, or brick, around the perimeter before the final gravel layer goes down. Edging needs to sit level with, or slightly above, the finished gravel surface, and if you're using a block or brick edge specifically, this needs its own excavated bed and mortar, laid and cured before the sub-base and gravel go in around it.
Step 5: Spread the Gravel
This is where the most common and most avoidable DIY mistake happens. Spread gravel to a maximum depth of around 50mm, ideally 40 to 50mm, never deeper. Laying it thicker doesn't improve the driveway's performance in any way, it only costs more, takes longer, and can actually make the surface less stable underfoot and under tyres, since loose, deep gravel shifts and ruts more than a properly shallow layer over a solid sub-base. Rake it level and compact lightly with the wacker plate, then top up any thin patches and give it a final light compaction pass.
Should You Use Gravel Stabilisation Grids?
For driveways on soft ground, a slope, or seeing heavy regular use, interlocking gravel grids sit on top of the compacted sub-base and lock the stones in place, significantly reducing the migration and rutting that loose gravel alone is prone to over time. They're not essential for every gravel driveway, but they're worth genuinely considering for anything beyond a light-use, flat, firm-ground situation, since they meaningfully extend how long the surface stays looking properly laid rather than gradually spreading and thinning.
Common Mistakes and What to Do Instead
Mistake: skipping the sub-base entirely. Gravel laid directly onto soil sinks and develops ruts within months under any regular vehicle weight. A proper compacted sub-base is essential for a driveway, not an optional upgrade.
Mistake: placing the membrane under the gravel instead of under the sub-base. This is a genuinely common misconception. The membrane's real job is protecting the sub-base from the soil beneath it, which means it belongs directly on the excavated ground, before the sub-base goes in.
Mistake: compacting the full sub-base depth in one pass. A thick layer tipped in all at once won't compact properly through its full depth. Build it up in thinner layers, compacting each one before adding the next.
Mistake: laying the gravel too deep. This is the single most common DIY error and has no benefit, it costs more, takes longer, and can leave the surface less stable. Keep the gravel layer to a maximum of around 50mm.
Mistake: using cheap, thin landscape fabric instead of a proper geotextile membrane. Decorative weed fabric degrades within a year or two under driveway conditions. Use a woven geotextile specifically rated for ground stabilisation.
Mistake: not compacting by machine. Hand tamping genuinely isn't sufficient for a driveway sub-base. A wacker plate or roller, hired for £30 to £50 a day, is worth the cost for the difference it makes to long-term stability.
Timeline and When to Do It
A single-car driveway, roughly 15 to 30m², typically takes a competent DIYer 2 to 3 days working alone, one day for excavation, one for the sub-base, and one for membrane, edging, and the final gravel layer, or a single weekend if two people are working together. Spring and early autumn are generally the best times to take this on, avoiding both waterlogged ground in winter and rock-hard, dry excavation conditions in a summer heatwave.
A Genuine Advantage Worth Knowing About
Gravel is a permeable surface, which means it doesn't require planning permission even for driveways over 5m² fronting a public highway, unlike impermeable options such as tarmac or standard sealed block paving, which need either drainage installed or full planning consent. If you're weighing gravel against a different material for this reason specifically, it's worth seeing how the numbers actually compare once that requirement is factored in. Our related guide on the InstantCost blog covers how much a resin driveway costs, another permeable option that avoids the same planning requirement gravel does, worth reading alongside this if you're deciding between the two rather than assuming gravel is automatically the cheaper permeable choice.
What It Costs in the UK
DIY materials for a gravel driveway vary by size, but as a rough guide, MOT Type 1 sub-base runs roughly £30 to £50 per tonne delivered, decorative gravel typically £40 to £80 per tonne depending on type and size, and geotextile membrane £1 to £3 per m². Wacker plate or roller hire typically costs £30 to £50 per day. Edging adds further cost depending on material: aluminium £8 to £15 per linear metre, timber sleepers £10 to £20 per metre, and brick or block edging £15 to £30 per metre.
If you'd rather have it done professionally rather than DIY, according to InstantCost.co.uk's 2026 UK driveway pricing data, gravel driveways cost £55 per square metre supplied and fitted, including VAT, excavation, and sub-base preparation, the cheapest of the six main UK driveway materials. On their standard size presets, that works out to roughly £825 for a single driveway (15m²), £1,980 for a double driveway (36m²), £3,080 for a three-car driveway (56m²), and £4,950 for an XL multi-car driveway (90m²).
Item or Service | Typical UK Cost (2026) |
|---|---|
MOT Type 1 sub-base, per tonne | £30 to £50 |
Decorative gravel, per tonne | £40 to £80 |
Geotextile membrane, per m² | £1 to £3 |
Wacker plate/roller hire, per day | £30 to £50 |
Aluminium edging, per metre | £8 to £15 |
Timber sleeper edging, per metre | £10 to £20 |
Brick/block edging, per metre | £15 to £30 |
Professional install, per m² (supplied and fitted) | £55 |
Professional install, single driveway (15m²) | Around £825 |
Professional install, double driveway (36m²) | Around £1,980 |
Professional figures are based on InstantCost.co.uk's 2026 UK pricing data. DIY material costs are general UK market estimates and vary by supplier and region. Always get two to three quotes if going professional, and factor in tool hire costs against your own time if comparing DIY against a professional quote.
Staying Safe
Excavation work involves genuine physical strain and, on larger jobs, machinery, use proper lifting technique for moving aggregate bags and take regular breaks on a multi-day project rather than pushing through fatigue. Before digging anywhere on your property, check for buried utilities, water, gas, or electrical services can run beneath a driveway area, and striking one is a genuinely serious risk that a quick check beforehand avoids entirely.
If children are in the home, keep them away from excavated areas, exposed edges, and any hired machinery while work is in progress, and cover or fence off open excavation overnight if the job spans more than a single day.
Utility locations and excavation depth requirements can vary by property and region, so it's worth checking for buried services and confirming ground conditions before starting significant excavation work.
FAQ
Do I need a sub-base for a gravel driveway? Yes, essentially always for a driveway. Gravel laid directly onto soil sinks and develops ruts within months under regular vehicle weight. A compacted MOT Type 1 sub-base at least 150mm deep is what actually bears the load.
Where does the membrane go when laying a gravel driveway? Directly on the excavated soil, before the sub-base goes in, not between the sub-base and the gravel layer. This is a common point of confusion, but the membrane's job is protecting the sub-base from the soil beneath it.
How deep should the gravel layer be? A maximum of around 50mm. Laying it deeper is one of the most common DIY mistakes, it adds cost and time without improving performance, and can actually make the surface less stable.
Do I need planning permission for a gravel driveway? No. Gravel is a permeable surface, so it's exempt from the planning permission requirement that applies to impermeable driveways over 5m² fronting a public highway.
How long does it take to lay a gravel driveway yourself? A single-car driveway typically takes a competent DIYer 2 to 3 days working alone, or a single weekend with two people, covering excavation, sub-base, membrane, edging, and the final gravel layer.
How much does it cost to lay a gravel driveway in the UK? Professional installation typically costs £55 per square metre including VAT and groundwork, working out to roughly £825 for a single driveway or £1,980 for a double, according to 2026 UK pricing data.