How to Lay a Stone Driveway
27 August 2026
How to Lay a Stone Driveway
Natural stone is the most expensive driveway material available in the UK and, when laid correctly, one of the most durable Indian sandstone rated at 25 years or more on a properly prepared base. When laid incorrectly, it is also one of the most expensive to put right, because lifting and relaying natural stone costs almost as much as the original installation. The sub-base is everything. A well-chosen stone on a poorly compacted base will rock, crack, and need attention within two or three winters.
Before material selection and bedding methods, there is a legal question specific to stone driveways that does not apply to gravel.
Planning Permission: The First Question
Natural stone laid as a solid surface is not permeable. Under the rules introduced in England in 2008, a new driveway over 5 square metres that fronts the public highway and uses an impermeable material requires either drainage to a soakaway or permeable border, or planning permission from the local authority.
Gravel, resin bound, and permeable block paving are exempt. Indian sandstone, granite setts, limestone, and porcelain are not, unless the installation incorporates drainage that directs all surface water to a permeable area such as a lawn or planted border rather than to the public highway or surface water drain.
For most residential stone driveway projects, the practical solution is to include a channel drain along the front boundary that directs runoff to a soakaway or permeable border. This satisfies the drainage requirement without a planning application and adds £300 to £600 to the project cost depending on run length and soakaway size.
If the property is in a conservation area, is listed, or has specific permitted development restrictions, check with the local planning authority before starting regardless of drainage arrangements.
Choosing the Stone
Four materials make up the bulk of UK residential stone driveway installations.
Indian sandstone is the most popular and the most cost-effective natural stone option. It is available in a wide range of colours from buff and grey to deep red and multi-colour blends, cuts cleanly, and handles UK weather well when sealed. The variation in thickness that comes with natural stone typically plus or minus 10 mm across a pallet needs accommodating during laying by adjusting the bed depth rather than trying to force uneven pieces flat. Supplied and fitted cost runs around £160 per square metre in 2026.
Granite setts are smaller units, typically 100 x 100 mm or 200 x 100 mm, laid in a brick bond or fan pattern. They are harder than sandstone, more resistant to frost, and handle vehicle traffic well over decades. The small unit size makes them labour-intensive to lay and therefore expensive. They suit period properties and narrower areas such as path edges or vehicle turning circles more naturally than large open driveway areas.
Limestone is denser and more uniform in thickness than sandstone, which makes laying easier, but it is more reactive to acid from leaves and rainwater in areas with significant tree cover. Unsealed limestone in a shaded driveway develops surface etching and discolouration within a few years. Sealing is more critical with limestone than with sandstone.
Porcelain paving is manufactured rather than quarried and has a consistent thickness and surface hardness that natural stone does not. It is frost-proof, non-porous without sealing, and available in large format sizes that reduce the number of joints and give a contemporary look. The consistent thickness makes it easier to lay to an even surface level. The hard, dense surface requires a diamond blade to cut and needs a flexible adhesive mortar rather than a sharp sand bed to achieve adequate bond.
Sub-Base: The Foundation That Determines Everything
For vehicle driveway use, excavate to a minimum total depth of 250 to 300 mm. This breaks down as 150 mm of compacted MOT Type 1 crushed stone sub-base, 50 mm of sharp sand or mortar bed, and the stone thickness, which varies by material but typically runs 20 to 40 mm for driveway-grade sandstone and 30 to 60 mm for granite setts.
On clay-heavy or soft soil, increase the sub-base depth to 200 mm and consider a layer of geotextile membrane beneath the Type 1 to prevent clay migration upward into the sub-base over time.
Compact the Type 1 sub-base in two passes with a plate compactor, 75 mm per pass, rather than as a single deep layer. A single deep pass does not compact the lower portion adequately and leaves a sub-base that settles unevenly under vehicle loads. Plate compactor hire runs £50 to £80 per day.
After compaction, check the surface level with a long spirit level and a straight edge. Lumps and hollows in the sub-base show up in the finished stone surface regardless of how carefully the stones are laid. Correct at sub-base stage rather than trying to compensate in the bed.
Bedding Method: Sharp Sand Versus Mortar
Sharp sand bed (semi-dry mix): Mix sharp sand with a small amount of cement at roughly 6:1 ratio to produce a semi-dry, crumbly mix that holds its shape when compressed in the hand but does not flow. Lay this to a depth that accommodates the thickness variation of the stone typically 30 to 50 mm and firm it with a rubber mallet and screed board before placing the stone. This method allows adjustment during laying and is the most common approach for natural sandstone and limestone.
Full mortar bed: A wetter mortar mix, similar to brick mortar consistency, provides a stronger bond but allows less working time and less adjustment once the stone is placed. This method is more appropriate for granite setts and for porcelain, which requires a flexible adhesive mortar specifically rather than a standard sand and cement mix.
Porcelain requires adhesive mortar, not sharp sand. The non-porous surface of porcelain does not bond to a dry mix. A standard mortar mix also provides insufficient adhesion. A polymer-modified, flexible tile adhesive applied full-bed to both the sub-base and the back of the porcelain slab is the correct bedding method for porcelain paving used in a vehicle driveway.
Step 1: Set Out the Driveway
Before any stone goes down, set out the perimeter with string lines fixed to temporary pegs at the boundary edges. Check the diagonal measurements to confirm the area is square equal diagonals confirm square corners. Establish the finished surface level and calculate the falls required for drainage.
A minimum fall of 1:60 toward the drainage channel or soakaway is needed to prevent water ponding. Mark the fall direction on the sub-base with a long straightedge and spirit level before laying the first stone.
Step 2: Lay the Edging First
Stone driveway edgings either matching stone setts, concrete kerbs, or steel edging go down before the main field of paving. Edging fixed on a concrete haunch provides the containment that prevents the main field from spreading laterally under vehicle loads. Concrete haunching mixed to a firm consistency, laid along the edge lines, and allowed to set before main laying begins provides a stable guide and permanent containment.
Step 3: Lay the Stone
Start laying from a fixed straight edge, typically the house wall or the front boundary, working across the area in the planned bond pattern. Butt the stones close but not touching a joint gap of 5 to 15 mm depending on the jointing material planned.
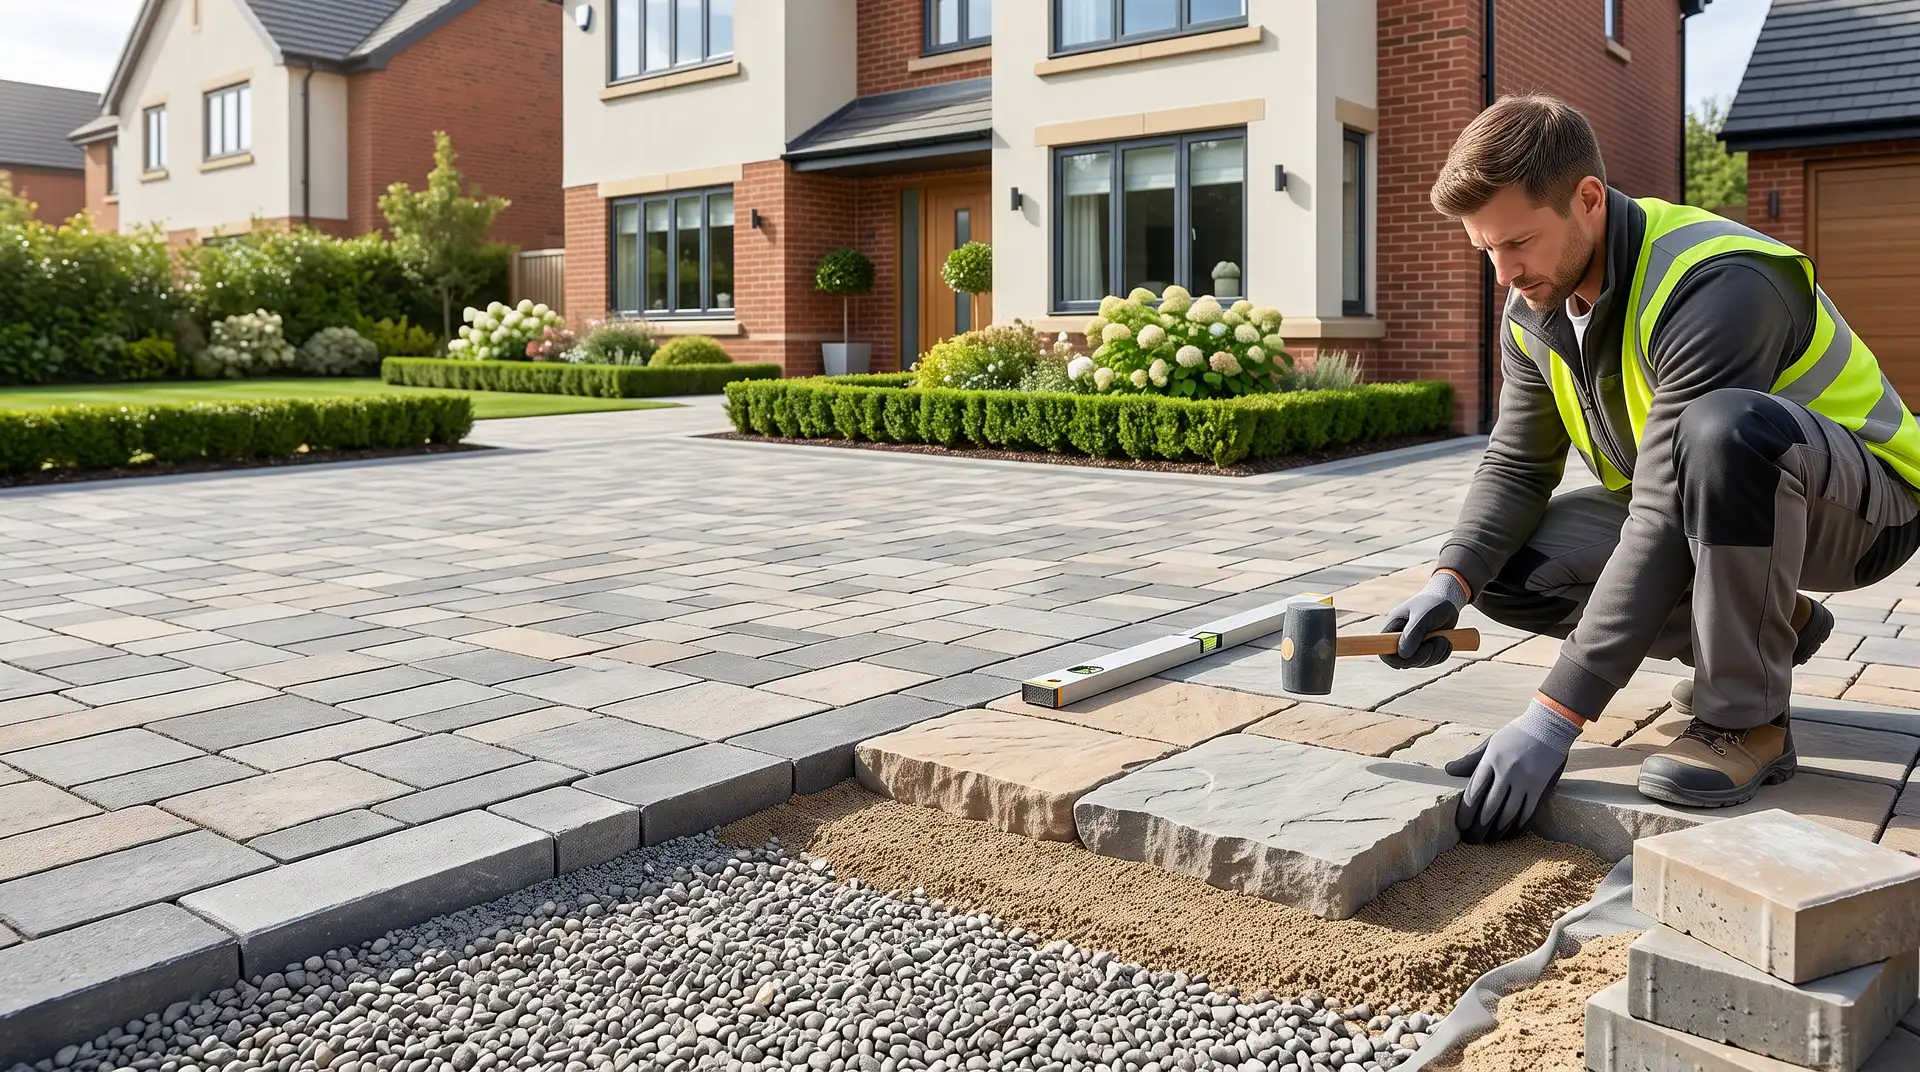
Bed each stone firmly by placing it on the prepared bed and tapping with a rubber mallet until it sits flat and flush with adjacent stones. Check level across two or three stones at a time with a long straightedge rather than checking each stone individually. Natural stone varies in thickness, so compensate in the bed depth rather than accepting a stepped surface.
Cut stones for edges and around obstacles with a diamond blade angle grinder or, for heavier cuts, a stone saw. Mark cuts with a chalk line and cut from the face side to maintain clean edges.
Step 4: Jointing
Allow 24 hours after laying before jointing to let the bed firm up. Two jointing methods suit natural stone driveways.
Kiln-dried brush-in sand: Suitable for areas with light vehicle use. Sweep dry jointing sand across the surface and brush into the joints, then compact with a plate compactor fitted with a rubber mat to protect the stone face. Needs re-sanding periodically as joints weather and flush out.
Mortar pointing: Mix a slightly dry mortar and press firmly into each joint with a pointing tool, finishing flush with the stone surface. More labour-intensive but provides a longer-lasting joint that resists weed ingrowth and washing out. On a vehicle driveway subject to frequent wheel loads, mortar pointing holds better than sand joints over time.
Avoid pointing in cold or wet weather. Frost before the mortar has cured causes joint cracking that requires raking out and reworking.
Step 5: Seal the Stone
Sealing natural stone is recommended for driveway use, particularly for sandstone and limestone. A penetrating impregnator sealer rather than a surface coating is the correct product for stone that will be driven on surface coatings peel under vehicle loads. Apply after pointing has fully cured, typically seven to ten days, on a dry day with a dry stone surface.
Sealing reduces water absorption, makes the surface easier to clean, enhances colour, and significantly slows moss and algae establishment. Reapply every three to five years depending on wear and exposure.
Porcelain does not require sealing since it is non-porous by manufacture.
A well-laid stone driveway will remain stable and attractive for 25 years or more with periodic cleaning, re-sealing, and occasional joint repair. Before committing to the investment, it is worth pricing the complete project stone, sub-base materials, skip hire, jointing, sealing, drainage channel, and any edging against the professional installation alternative. According to InstantCost 2026 UK driveway pricing data, Indian sandstone costs £160 per square metre professionally supplied and fitted. A standard double driveway of 36 square metres sits at approximately £5,760 for the stone surface alone, with drainage adding £850, decorative edging £380, and sealant treatment £320. The InstantCost driveway cost guide has a 2026 calculator you can filter by stone type, area, and optional extras before approaching any contractor, so the full cost picture is clear before any quote is accepted.
Natural stone and gravel are often compared on cost and planning permission grounds because gravel is the only common driveway material that is both cheaper and fully permeable without drainage engineering. For a clear side-by-side of both options on planning rules, sub-base requirements, and long-term maintenance, our related guide on how to lay a gravel driveway covers the permeable surface route that avoids the planning permission question entirely for properties where drainage to a soakaway or border is not straightforward.
Common Mistakes and What to Do Instead
Mistake: not resolving the planning permission question before starting. A stone driveway laid without drainage provision on an impermeable surface over 5 square metres fronting a public highway is potentially in breach of planning rules. Sort the drainage solution or the planning application before any groundwork begins.
Mistake: skimping on sub-base depth for vehicle use. A 100 mm sub-base under a car driveway will settle and produce rocking stones within two to three winters. Minimum 150 mm compacted MOT Type 1, 200 mm on clay.
Mistake: laying porcelain on a sharp sand bed. Porcelain requires full-bed flexible adhesive mortar. Sharp sand provides insufficient bond to a non-porous surface and produces bedding failures within a season.
Mistake: pointing in cold or wet conditions. Mortar joint curing requires frost-free temperatures for at least 24 hours. Frost before curing causes cracking through the full joint depth and requires complete raking out and reworking.
Mistake: sealing before the pointing has fully cured. Sealer applied over uncured mortar traps moisture in the joint and prevents full cure, producing soft, friable joints. Wait seven to ten days minimum after pointing.
Mistake: not setting out drainage falls before laying. A level stone driveway pools water after every rainfall. Set the fall to a minimum of 1:60 toward the drainage channel before the first stone goes down, not after.
Mistake: using brush-in sand jointing on a heavily used vehicle driveway. Sand joints flush out under repeated wheel loads and establish weeds within a season. Mortar pointing is the correct approach for any area subject to regular vehicle traffic.
What It Costs in the UK
Item or service | Typical UK cost (2026) |
|---|---|
Indian sandstone, supplied and fitted | £160 per m² |
Double driveway (36m²), stone only | £5,760 |
Drainage / soakaway (optional extra) | £850 |
Decorative edging or kerbs | £380 |
Protective stone sealant | £320 |
MOT Type 1 sub-base material (per tonne) | £30 to £50 |
Sharp sand (per tonne) | £40 to £60 |
Flexible adhesive mortar (porcelain) | £15 to £30 per bag |
Plate compactor hire (per day) | £50 to £80 |
Skip hire, 6-yard | £200 to £350 |
Penetrating stone sealer | £20 to £50 per litre |
Channel drain, installed (per linear metre) | £60 to £120 |
Figures based on InstantCost.co.uk's 2026 UK driveway pricing data and vary by region, access, and stone type. London and South East typically run 20 to 30% above national average.
Staying Safe
Excavation to 250 to 300 mm near a property boundary carries the same underground service risk as any groundwork. Confirm service locations with Dial Before You Dig (0800 96 73 60) before breaking ground. Gas pipes, electrical cables, and water supply pipes regularly run within 200 mm of the surface near property boundaries.
Plate compactors generate significant vibration that transmits to nearby foundations. On older properties with shallow foundations, or where the work area is immediately adjacent to the building, sustained compaction near the wall line should be done carefully and at low machine speed. If in doubt, compact away from the building and finish the last metre by hand tamping.
Stone cutting with a diamond blade angle grinder produces silica dust from the cut stone, which is a serious respiratory hazard with repeated exposure. Wear an FFP3 respirator, not a dust mask, when cutting any natural stone. Wet cutting, where a water feed suppresses the dust at the blade, significantly reduces airborne silica and is the preferred method for prolonged cutting work.
Keep children and pets away from the work area throughout. Freshly laid stone with uncured mortar joints is easily displaced. Tools, cut stone off-cuts, and bags of cement and mortar are all hazards at ground level.
Planning permission requirements for driveways in England are set under the Town and Country Planning (General Permitted Development) (England) Order 2008 as amended. The permeable surface requirement applies to new driveways fronting a highway. Replacement of an existing driveway with a like-for-like area may benefit from permitted development rights in some circumstances. Always verify current requirements with the local planning authority before work begins, as rules vary and may have been updated.
FAQ
Do you need planning permission for a stone driveway in the UK? Natural stone is an impermeable surface. For a new driveway over 5 square metres fronting a public highway, you need either drainage to a permeable area (soakaway or planted border) or planning permission. Including a channel drain directing runoff to a soakaway satisfies the drainage requirement without a planning application.
What is the best stone for a driveway in the UK? Indian sandstone is the most popular and cost-effective natural stone for UK driveways at around £160 per square metre fitted. Granite setts are more durable but labour-intensive to lay. Porcelain offers consistent thickness and low maintenance but requires adhesive mortar rather than a sharp sand bed.
How deep should the sub-base be for a stone driveway? 150 mm of compacted MOT Type 1 for a vehicle driveway on stable ground, 200 mm on clay or soft soil. Plus 30 to 50 mm of sharp sand or mortar bed, plus the stone thickness. Total excavation depth of 250 to 300 mm for most UK residential installations.
Can I lay a stone driveway myself? The groundwork excavation, sub-base, and compaction is achievable DIY on a single-car driveway. The laying itself requires patience with level-checking and the ability to cut stone accurately. Porcelain specifically requires adhesive mortar and precise cutting and is more demanding than sandstone. On a double driveway or larger, most homeowners find professional installation is cost-effective given the labour involved.
How long does a stone driveway last? Indian sandstone and granite setts rated at 25 years or more on a correctly prepared sub-base. Porcelain similarly long-lived. Lifespan depends almost entirely on sub-base quality a stone driveway on a poorly compacted base fails in five years regardless of how well the surface was laid.
Does a stone driveway need sealing? Sandstone and limestone benefit significantly from sealing, which reduces water absorption, slows moss growth, and makes cleaning easier. Use a penetrating impregnator rather than a surface coating on a vehicle driveway. Reapply every three to five years. Porcelain does not require sealing.