How to Remove Plumber’s Putty
9 October 2026
How to Remove Plumber’s Putty
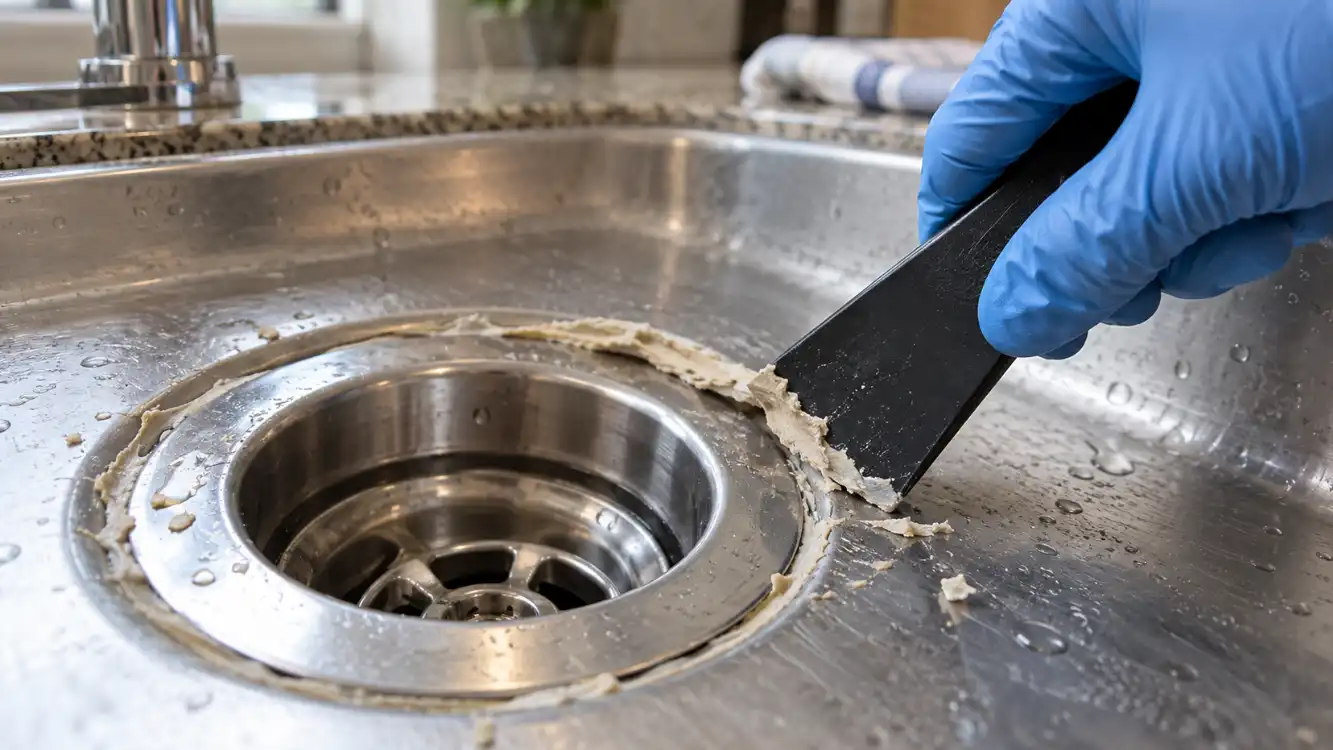
To remove plumber’s putty, loosen the fitting, lift away the old putty with a plastic scraper or blunt tool, then wipe the remaining film with a clean cloth. Finish by cleaning and drying the surface before fitting a new seal.
Plumber’s putty is a soft, non-setting compound commonly used around sink wastes, basket strainers and other low-pressure sanitary fittings. In the UK, people may also use the term Plumber’s Mait for a similar non-setting sealing compound.
Quick answer: Remove the fitting first, scrape away the thick putty with a plastic scraper, roll or wipe off the remaining residue, then clean the surface with mild soapy water and dry it completely. Do not use a sharp blade aggressively on stainless steel, ceramic, stone or laminate.
Where Is Plumber’s Putty Usually Found?
Kitchen sink waste or basket strainer
Bathroom basin waste flange
Bath waste fitting
Overflow fitting
Sink drain flange
Low-pressure sanitary joints
Plumber’s putty is normally found between a fitting and the sink or basin surface. The rubber washer underneath the fitting may provide a separate seal, so inspect both parts during removal.
Plumber’s Putty, Silicone and Plumber’s Mait
Material | Typical behaviour | Removal method |
|---|---|---|
Plumber’s putty | Soft and non-setting | Lift, scrape and wipe away |
Plumber’s Mait | Soft, non-setting plumbing compound | Roll, scrape and clean residue |
Silicone sealant | Cures into a flexible rubber | Cut carefully with a scraper or sealant tool |
Rubber or fibre washer | Pre-formed sealing gasket | Remove and replace if damaged |
Do not treat cured silicone as plumber’s putty. Silicone usually needs to be cut away, while putty can normally be lifted and rolled off.
Tools You Need
Bucket and old towels
Rubber gloves
Plastic scraper or old bank card
Blunt wooden stick
Old toothbrush
Microfibre cloths
Mild washing-up liquid
Adjustable wrench or basin wrench
Replacement washer or approved sealant if required
A plastic scraper is safer than a craft knife on stainless steel, glazed ceramic, acrylic, laminate and stone surfaces.
How to Remove Plumber’s Putty from a Sink Waste
1. Isolate the water supply if necessary
A sink waste normally carries drainage water rather than pressurised supply water, but turn off the tap and clear the bowl before dismantling the fitting. If supply hoses or a tap must be disconnected, close the isolation valves first.
2. Place a bucket underneath
Put a bucket and towels inside the cabinet. Water trapped in the waste and U-bend can spill when the fitting is loosened.
3. Loosen the retaining nut
Use a basin wrench or adjustable wrench to loosen the retaining nut underneath the sink. Support the fitting from above so it does not twist against the sink surface.
4. Lift out the waste fitting
Once the nut, washer and associated parts are removed, lift the waste or strainer out from above. If it is stuck, gently rock it from side to side rather than levering hard against the sink.
5. Remove the thick putty
Pull away large pieces with your fingers while wearing gloves. Roll soft residue between your fingers or use a plastic scraper to lift it from the sink and fitting.
6. Scrape the remaining film
Hold the scraper almost flat and work around the opening. Use light pressure so you do not chip ceramic, scratch stainless steel or damage a laminate cut-out.
7. Clean the surface
Use warm water and a small amount of washing-up liquid on a cloth. An old toothbrush can clean the threads, underside of the flange and edges around the waste opening.
8. Dry everything
Dry the sink surface, waste fitting and underside completely. New putty or sealant will not form a reliable seal against grease, water or old residue.
9. Inspect the washer
Check the rubber or fibre washer for cracks, flattening and hardening. Replace it if damaged. Removing old putty will not fix a leak caused by a failed washer.
10. Refit using the correct seal
Use the replacement fitting’s instructions. Some wastes are designed for plumber’s putty, while others require a rubber gasket or a compatible silicone seal. Do not add putty where the manufacturer specifically says not to.
How to Remove Putty from Stainless Steel
Lift the putty with a plastic scraper and wipe the remaining film with warm soapy water. Follow the brushed grain of the steel rather than rubbing in circles.
Do not use wire wool, a razor blade held upright or an abrasive scourer. These can create permanent scratches and may leave metal particles that produce rust-coloured marks.
How to Remove Putty from Ceramic or Porcelain
Use a plastic scraper or wooden stick and keep the tool almost flat against the glazed surface. Avoid tapping or levering against the edge of the opening because chipped glaze can prevent the replacement fitting from sealing.
Clean the final residue with mild soapy water and dry the surface. Avoid strong acids and abrasive powders unless the ceramic manufacturer confirms they are suitable.
How to Remove Putty from Stone or Laminate
Stone and laminate can be more sensitive to scraping and chemicals. Lift the putty gently and use only a cleaner approved for the specific surface.
Do not use solvent, acetone or strong acidic cleaner on an unknown worktop. If the fitting has bonded to the worktop or the cut-out is damaged, a plumber or worktop specialist should assess it.
What If the Putty Has Hardened?
Some old putty becomes firmer after years of drying, contamination or exposure to cleaning products. Warm the area gently with a warm damp cloth, then try lifting it with a plastic scraper.
Do not use an open flame or high heat near a sink cabinet, sealant, plastic waste or flexible hoses. If the material is actually cured silicone, use a suitable sealant-removal method instead.
Common Mistakes
Confusing plumber’s putty with cured silicone
Using a sharp blade aggressively on the sink surface
Reusing a cracked or flattened washer
Applying new putty over greasy residue
Overtightening the retaining nut
Using putty where the fitting manufacturer specifies silicone
Testing the joint before the fitting is aligned correctly
How to Check the New Seal
Run a small amount of water into the sink and watch the fitting from underneath. Wipe the underside with dry tissue because a slow drip may not be visible immediately.
Fill the basin partially, release the water and check again. If the leak appears around the retaining nut, inspect the washer and fitting alignment instead of simply adding more putty.
Need help with a leaking or loose waste fitting?
Check current UK plumbing rates for repairs, waste fittings and small plumbing jobs.
When to Call a Plumber
Use a plumber if the waste fitting will not loosen, the sink or worktop is cracked, the pipework is badly corroded, the leak continues after a new washer and seal or you cannot isolate the water safely.
Ask for an itemised quote covering labour, replacement waste, washers, sealant, access and disposal. InstantCost’s current UK plumbing guide places standard plumber rates around £40 to £80 per hour, although a minimum charge may apply.
Safety Guidance
Wear gloves when handling old putty and standing water. Keep tools away from children and protect the cabinet base from spills. Do not use solvents or chemical cleaners unless the product label confirms they are suitable for the sink and worktop materials.
For manufacturer advice on plumber’s putty use and removal, read Oatey’s plumber’s putty guidance. Follow the instructions supplied with your sink waste or drain fitting.
Frequently Asked Questions
Is plumber’s putty easy to remove?
Usually, yes. It is a non-setting compound, so most old putty can be lifted, rolled away and scraped gently from the fitting and sink surface.
What is the best tool for removing plumber’s putty?
A plastic scraper, old bank card or blunt wooden tool is safer than a sharp blade. Choose a tool that will not scratch the sink or worktop.
Can I use vinegar to remove plumber’s putty?
Vinegar is usually unnecessary. Remove the putty mechanically and clean the remaining film with warm water and mild washing-up liquid. Check the surface manufacturer’s instructions before using any acidic cleaner.
Do I need to replace the washer after removing putty?
Replace it if it is cracked, flattened, brittle or permanently distorted. A new seal will not compensate for a damaged washer.
Can I reuse old plumber’s putty?
Do not reuse contaminated, dry or crumbly putty. Use fresh material or the seal recommended by the fitting manufacturer.
Why is my sink still leaking after replacing the putty?
The washer may be damaged, the fitting may be misaligned, the retaining nut may be loose or overtightened, or the leak may be from a nearby connection rather than the flange.
Want a professional plumbing quote?
Describe the waste fitting or leak and request written prices from local plumbing professionals.