How to Tile a Bathroom Floor UK | Step-by-Step Guide
14 October 2026
How to Tile a Bathroom Floor
To tile a bathroom floor, prepare a firm and level subfloor, waterproof where required, plan the layout, spread the correct adhesive, set the tiles with even joints, then grout and seal the edges. The tiles are only as durable as the floor beneath them, so preparation is the most important stage.
Bathroom floors are exposed to water, movement and temperature changes. Choose floor-rated, slip-resistant tiles and use adhesive and grout approved for the tile material and subfloor.
Quick answer: Remove the old flooring, repair and level the subfloor, install an appropriate waterproofing or tile-backer system, mark the layout from the centre, fix the tiles with flexible adhesive, leave them to cure, then grout and seal the perimeter.
What You Need
Bathroom floor tiles
Flexible tile adhesive suitable for the subfloor
Flexible grout suitable for floors and wet areas
Tile spacers or a levelling system
Notched trowel
Tile cutter or wet saw
Tile nippers for small cuts
Spirit level and straightedge
Measuring tape and pencil
Rubber grout float
Clean sponge and buckets
Waterproofing or tanking system where required
Silicone sealant for perimeter and movement joints
Dust mask, eye protection and knee pads
Choose the Right Bathroom Floor Tiles
Tile type | Advantages | Check before buying |
|---|---|---|
Porcelain | Hard-wearing and low absorption | Use porcelain-compatible adhesive and cutting equipment |
Ceramic floor tile | Wide choice and generally easier to cut | Confirm it is rated for floors |
Natural stone | Distinctive appearance | May need sealing and specialist adhesive |
Mosaic | Useful around curves and detailed layouts | Check sheet backing and grout-joint size |
Large-format tile | Fewer grout lines and modern appearance | Requires a very flat floor and careful handling |
Choose a surface with suitable slip resistance for a bathroom. Glossy wall tiles are not automatically safe for floors.
Check the Subfloor Before Tiling
Lift loose flooring and inspect the base for damp, movement, rot, cracks, soft spots and uneven areas. Do not tile over a leaking toilet, bath waste or pipe joint.
Concrete or screed
Remove dust, paint, adhesive residue and loose material. Repair cracks and level uneven areas with a suitable floor compound. The base must be dry enough for the adhesive system you intend to use.
Timber or chipboard
Wooden floors can flex when walked on. Secure loose boards, check for movement and use a suitable tile backer board or decoupling system. Follow the system manufacturer’s fixing and jointing instructions.
Existing tiles
Existing tiles can sometimes remain if they are firmly bonded, flat, clean and strong enough to carry the new floor. Remove hollow or loose tiles and account for the extra finished height at doors, toilets and thresholds.
Do You Need to Waterproof a Bathroom Floor?
Tiles and grout are not a complete waterproof barrier. Where the floor is exposed to regular spray, such as a wet room or open shower, use a compatible waterproofing membrane or tanking system beneath the tiles.
Seal floor-to-wall junctions, corners, pipe penetrations and changes of material according to the tanking manufacturer’s instructions. Do not assume ordinary adhesive and grout will protect a timber floor from repeated water exposure.
Technical guidance from the NHBC guidance on tiled bathroom substrates explains the importance of suitable waterproofing and substrate preparation.
How to Tile a Bathroom Floor Step by Step
1. Remove the old floor covering
Remove old tiles, adhesive, vinyl or loose flooring. Our guide to removing bathroom tiles explains how to deal with old adhesive and damaged backgrounds.
2. Repair and level the floor
Fill holes, secure movement in timber and use a suitable levelling compound where necessary. Check the surface with a straightedge because small dips can cause tiles to rock or crack.
3. Install the backer or waterproofing system
Fit the approved tile backer board, membrane or tanking system. Seal joints and penetrations as specified. Allow primers and waterproofing coats to dry for the stated time.
4. Measure and plan the layout
Measure the room in both directions and mark centre lines. Lay dry tiles without adhesive to check the appearance and identify narrow cuts.
Avoid leaving very narrow strips at doorways, walls or around the toilet. Shift the starting line slightly if this creates a more balanced layout.
5. Mark fixed obstacles
Mark the toilet, basin pedestal, bath panel, pipe boxing and door threshold. If the toilet is being removed, plan the tile layout so the finished floor can be sealed neatly around the pan.
6. Mix the adhesive
Mix flexible adhesive exactly as directed. Use the correct powder-to-water ratio and allow the required slaking time if the instructions specify one.
7. Spread a manageable area
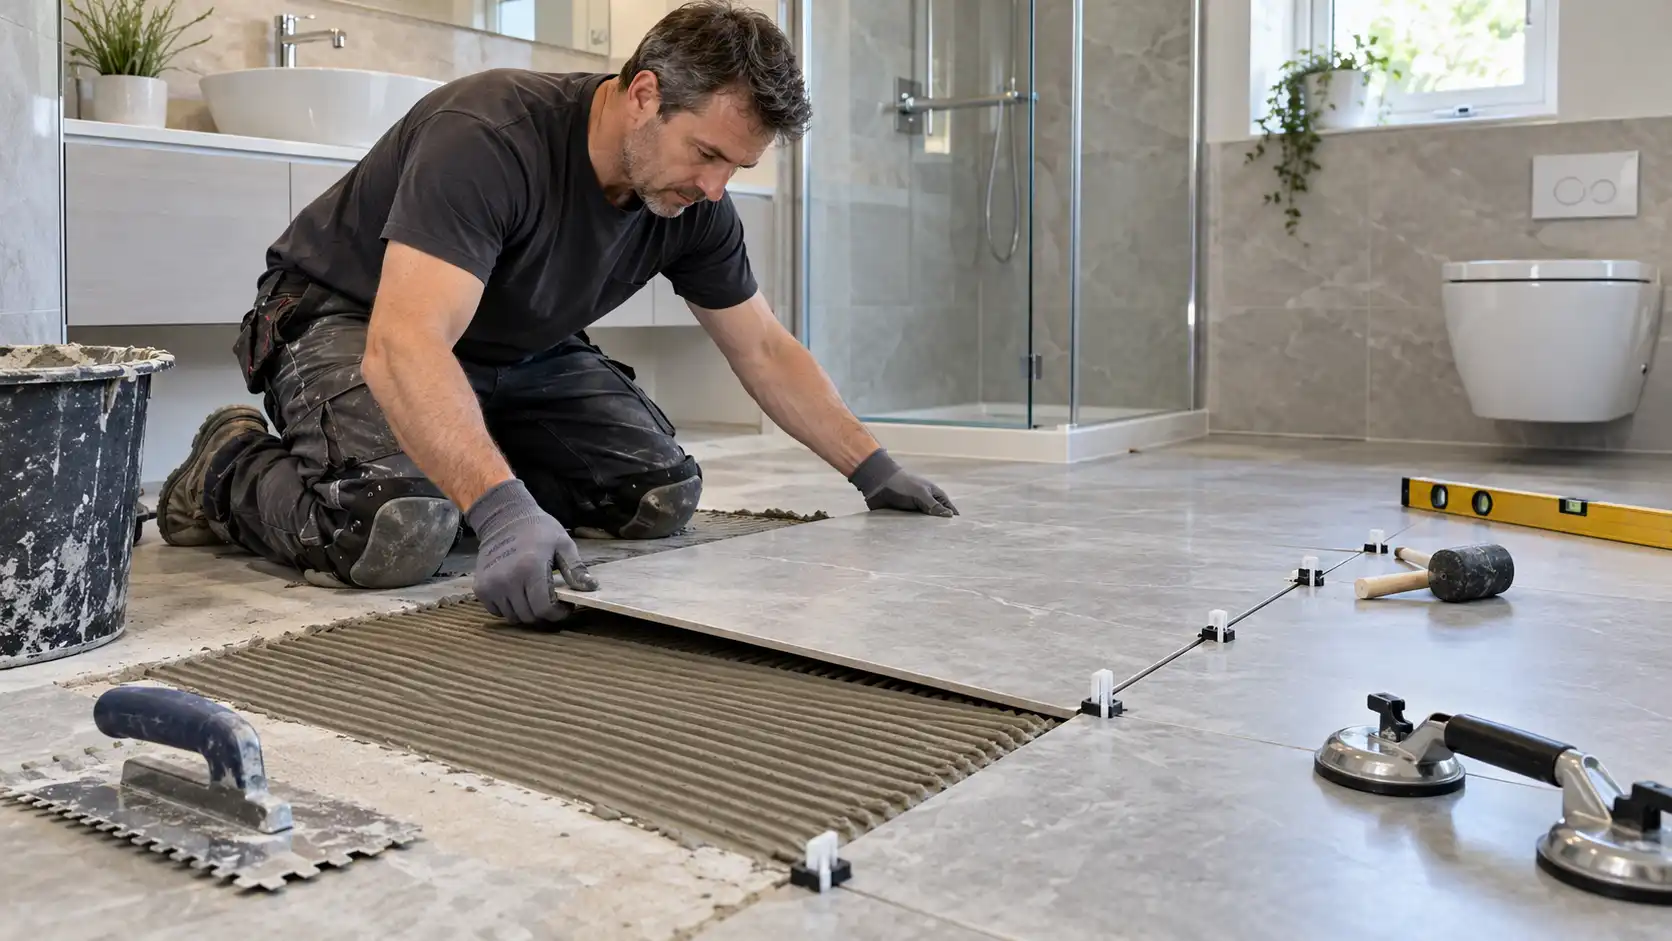
Use the notched trowel at the recommended angle and spread only enough adhesive to cover tiles before it skins over. Comb the adhesive in consistent lines.
8. Back-butter large tiles where required
For large or uneven-backed tiles, apply a thin coat of adhesive to the back as well as the floor if the manufacturer recommends it. Aim for continuous support rather than hollow patches.
9. Set the first tiles
Press each tile into the adhesive with a slight sliding movement. Use spacers or a levelling system to keep the joints consistent. Check the level frequently.
10. Cut edge tiles
Measure each cut separately because walls are rarely perfectly square. Wear eye protection when cutting and leave the required movement gap around the perimeter.
11. Leave the adhesive to cure
Keep the floor free from traffic for the time stated by the adhesive manufacturer. Do not grout while tiles are moving or the adhesive is still soft.
12. Remove spacers and clean joints
Remove spacers and scrape excess adhesive from the joints before it hardens. Vacuum dust without scratching the new surface.
13. Apply the grout
Press grout diagonally across the joints with a rubber float. Work in manageable sections and remove excess grout before it dries on the tile face.
14. Polish the tile surface
Use a damp sponge to remove the grout haze, rinsing it frequently. Once the surface has dried, polish away the remaining film with a clean dry cloth.
15. Seal movement joints
Use flexible sanitary silicone at the perimeter, around pipe penetrations and where the floor meets a bath or shower area. Do not fill movement joints with rigid grout.
How Long Before You Can Use the Bathroom?
Follow the adhesive and grout manufacturer’s curing times. Light foot traffic may be allowed after approximately 24 hours, but showers, baths and heavy use may need longer. A floor that feels firm is not necessarily ready for repeated water exposure.
Common Bathroom Floor Tiling Mistakes
Tiling over a damp or moving subfloor
Skipping waterproofing in a wet-room area
Using wall tiles on the floor
Leaving very narrow cuts beside a wall
Mixing too much adhesive at once
Failing to check the tile batch and shade
Grouting before the adhesive has cured
Using rigid grout at movement joints
Leaving adhesive in the joints
Walking on the floor before it has set
Need professional bathroom tiling?
Compare current UK bathroom renovation and tiling prices before booking a local tiler.
How Much Does Bathroom Floor Tiling Cost?
InstantCost’s current bathroom guide places a standard bathroom tiling project, covering floor and walls, at approximately £1,000 to £3,000. A floor-only job will depend on the room area, old tile removal, subfloor repairs, waterproofing and the tile selected.
Ask for an itemised quote that separates tile removal, floor preparation, tanking, tile supply, adhesive, grout, labour and waste disposal.
Use the InstantCost bathroom tiling cost guide to compare current UK estimates.
Safety Guidance
Wear eye protection when cutting tiles and a suitable dust mask when mixing dry powders or removing old adhesive. Keep electrical tools away from standing water and use a suitable residual-current device.
Do not tile over a leak, rotten timber or an unstable floor. If removing a toilet, basin or bath requires plumbing disconnection, isolate the water and use a plumber if you are not confident.
The Tile Association recommends using suitable waterproofing, adhesive and grout systems for bathroom and wet-area tiling. Read its technical tiling guidance alongside the product manufacturer’s instructions.
Frequently Asked Questions
Can I tile a bathroom floor myself?
Yes, a small, sound and level floor can be suitable for DIY tiling. Waterproofing, timber subfloors, large-format tiles, wet rooms and major floor repairs require more experience and careful preparation.
Do I need to waterproof a bathroom floor before tiling?
Tiles and grout alone are not waterproof. Use a compatible tanking or membrane system where the floor is exposed to regular water, especially in a wet room or open shower area.
Can I tile directly onto bathroom floorboards?
Usually, not without preparation. Timber floors can move, so they normally need a suitable tile backer board or decoupling system fixed according to the manufacturer’s instructions.
Should bathroom floor tiles be laid from the centre?
Marking centre lines helps balance the cuts on opposite walls. Adjust the starting point after a dry layout so you do not finish with an extremely narrow strip.
How long after tiling can I walk on the floor?
Many systems allow light foot traffic after around 24 hours, but follow the exact adhesive and grout instructions. Shower use may need longer.
How much does it cost to tile a bathroom floor?
A full standard bathroom tiling project covering walls and floor commonly costs £1,000 to £3,000 in the UK. A floor-only quote depends on size, preparation, waterproofing, tiles and labour.
Ready to plan your bathroom floor?
Check current UK tiling estimates and compare the likely cost of preparation, materials and labour.