How to Remove Bathroom Tiles
29 September 2026
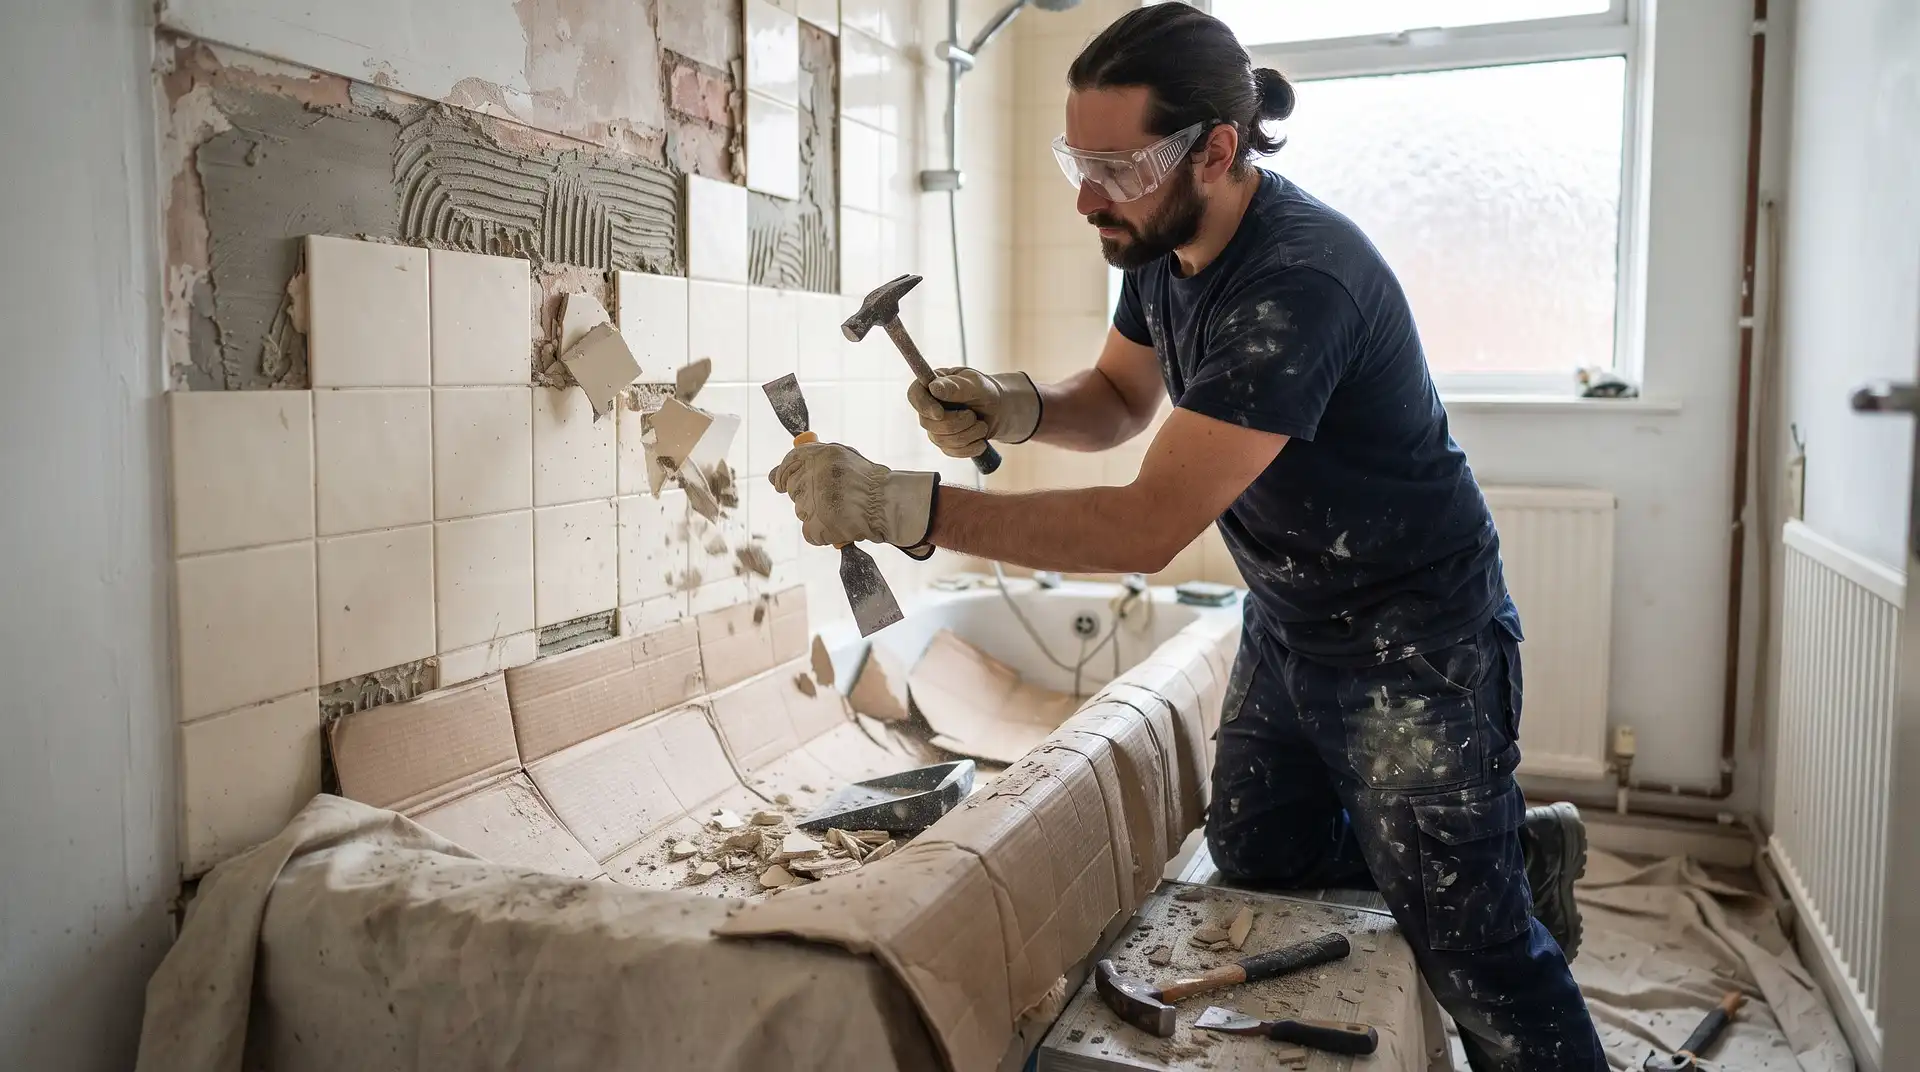
To remove bathroom tiles, first protect the room and put on safety equipment. Remove the grout around the first tile, break or loosen it carefully and slide a wide tile chisel behind it. Keep the chisel at a shallow angle and work across the wall or floor in small sections.
Bathroom tile removal is messy, noisy and likely to damage at least part of the surface underneath. Wall tiles fixed directly to plasterboard can tear away its paper face, while floor tiles laid on a solid adhesive bed may require a powered tile-removal tool.
Quick answer: Remove silicone and grout around the starting tile, break the tile towards its centre and use a wide chisel to lift the remaining pieces. Work slowly with the chisel almost parallel to the wall or floor. Expect to patch plaster, replace damaged plasterboard or remove old adhesive before fitting new tiles.
Can You Remove Bathroom Tiles Yourself?
Removing tiles is possible as a DIY job if the bathroom is accessible, you have suitable safety equipment and you are comfortable using hand tools.
The difficulty depends on four things:
Whether the tiles are on a wall or floor
Whether the surface underneath is masonry, plaster, plasterboard or tile backer board
How strongly the adhesive has bonded
Whether pipes, electrical cables or underfloor heating are hidden behind the tiles
Removing a tiled splashback from a solid wall is normally easier than stripping a complete shower enclosure from plasterboard. Floor tiles laid on concrete can also require much more force than lightweight ceramic wall tiles.
Tools and Safety Equipment You Will Need
Tool or equipment | What it is used for |
|---|---|
Safety glasses or goggles | Protecting your eyes from sharp tile fragments |
Heavy-duty gloves | Handling broken ceramic and porcelain safely |
Safety footwear | Protecting your feet from falling tiles |
Suitable dust mask | Reducing exposure to tile, grout and adhesive dust |
Grout rake or multi-tool | Removing grout around the starting tile |
Club hammer | Tapping the chisel and breaking tiles carefully |
Wide tile or bolster chisel | Lifting tiles and removing adhesive |
Plastic scraper | Removing silicone and loose residue |
Dust sheets and cardboard | Protecting baths, shower trays and floors |
Rubble sacks | Containing broken tiles without overloading normal bin bags |
A small SDS drill with a tile-removal chisel can help with stubborn floor tiles and adhesive. It can also damage plasterboard, pipes, cables and the subfloor quickly, so use it only when you understand what is beneath the tiles.
Prepare the Bathroom Before Removing Tiles
Clear the room
Remove toiletries, towels, freestanding furniture and anything else that could collect dust. Take down mirrors, shelves and accessories fixed to the tiled area.
Protect the bathroom suite
Cover the bath, shower tray, basin and toilet with thick cardboard followed by a dust sheet. A falling tile can chip acrylic, enamel, ceramic or glass.
Do not rely on a thin plastic sheet alone. It contains dust but provides little protection from a sharp piece of tile.
Remove nearby fittings where necessary
Removing taps, showers, toilets or basins may make the tile removal easier, but plumbing fixtures must be isolated correctly first. If you are unsure how to isolate or disconnect them, arrange for a plumber to do it.
Check for hidden services
Use a suitable detector and inspect the room layout before striking or drilling into a tiled surface. Pipes and cables are commonly found:
Behind taps and shower controls
Directly above or below sockets and switches
Close to heated towel rails
Behind boxed pipework
Under tiled floors with electric or water-based underfloor heating
Important: Do not drive a chisel deeply into the wall. Keep it at a shallow angle behind the tile so the force travels along the surface instead of towards concealed pipes and cables.
Ventilate and contain the dust
Close internal doors and open an exterior window if possible. Seal gaps around the bathroom door with sheeting to stop dust spreading through the home.
Turn off heating or ventilation systems that could carry dust to other rooms. Do not allow children or pets into the working area.
How to Remove Bathroom Wall Tiles
1. Remove silicone and trim
Cut through silicone where the tiles meet the bath, shower tray, basin, window or adjoining wall. Pull away plastic trims carefully.
Removing these flexible joints separates the tiled section from nearby fittings and makes it easier to reach a tile edge.
2. Choose the first tile
Look for a tile that is already cracked, loose or hollow sounding. Starting with a weak tile usually requires less force.
If every tile is secure, choose one near the centre of the area and away from visible plumbing or electrical fittings. Do not begin directly beside a tap, shower valve, socket or cable route.
3. Remove the grout around it
Use a manual grout rake or oscillating multi-tool to clear the grout around all four sides of the first tile. This separates it from the surrounding tiles and reduces the chance of damaging them.
Control dust when using a powered tool and avoid cutting beyond the depth of the grout joint.
4. Break the centre of the tile
Place a small masonry chisel or centre punch near the middle of the tile and tap it gently with a hammer. Break the tile inwards rather than striking close to an edge.
Remove the small centre pieces first. This creates space to work towards the edges without levering against neighbouring tiles.
5. Slide the chisel behind the tile
Once you have exposed the adhesive, place a wide tile chisel behind the remaining pieces. Hold it at a shallow angle and tap it gently.
Move the chisel to several positions rather than forcing one point. The aim is to separate the adhesive bond without digging deeply into the wall.
6. Continue across the wall
After removing the first tile, use its exposed edge to reach the tiles around it. Work from the open area outwards.
Remove tiles in manageable sections and place the pieces directly into rubble sacks. Do not leave broken fragments on the floor where they can become a cutting or trip hazard.
Useful technique: Keep the chisel as flat as possible against the wall. A steep angle is more likely to gouge plaster, break plasterboard or puncture a hidden service.
How to Remove Tiles From Plasterboard
Removing tiles from plasterboard without causing any damage is not always possible. Strong tile adhesive can bond more firmly to the plasterboard paper than the paper is bonded to the gypsum core.
Use a wide scraper or chisel and work slowly. Stop if large areas of paper or gypsum are coming away with every tile.
Minor surface tears may be repairable. Replacement is usually better when:
The gypsum core is exposed across a large area
The board has become soft or swollen
There is evidence of mould or water damage
The board moves between the studs
Large holes have been created during removal
The wall forms part of a shower or another regularly wet area
In a shower enclosure or above a bath with a shower, damaged boards should normally be replaced with a suitable tile backer board or another approved wet-area system. The area must then be waterproofed correctly before new tiles are installed.
How to Remove Bathroom Floor Tiles
1. Remove fixtures and trims
Remove the toilet, pedestal basin and any trims that prevent access to the floor tiles. Isolate water supplies before disconnecting bathroom fixtures.
2. Check for underfloor heating
Confirm whether electric cables or heating pipes run beneath the tiles. Powered removal tools can destroy an underfloor heating system within seconds.
If the layout is unknown, arrange an appropriate inspection before starting.
3. Start at an exposed edge
A doorway, pipe opening or loose tile provides the easiest starting point. If no edge is available, remove the grout around one tile and break its centre carefully.
4. Lift the first tile
Insert a wide floor scraper or tile chisel beneath a broken edge. Keep the tool at a low angle and tap it forward.
Porcelain floor tiles can break into extremely sharp pieces. Wear eye protection, gloves and covered footwear throughout the work.
5. Work in rows
Once the first tile has been removed, continue from the open edge. Clear loose pieces regularly so you maintain a stable working area.
6. Remove the adhesive
Scrape or chisel away high spots after the tiles have been removed. The floor must be stable, clean and reasonably level before it can receive new tiles or levelling compound.
A solid concrete floor may tolerate a powered floor scraper. Timber, cement board and floors containing heating systems require more control.
How to Remove One Bathroom Tile
If only one tile is cracked, you can remove it without stripping the whole wall.
Remove the grout completely from all four sides.
Cover the tile with tape to reduce flying fragments.
Break the centre carefully.
Remove small pieces working from the centre towards the edges.
Keep the chisel angled towards the empty centre.
Remove the old adhesive without damaging the background.
Check that the replacement tile fits before applying fresh adhesive.
Do not lever against the edges of the surrounding tiles. This can chip them or break their bond with the wall.
How to Remove Old Tile Adhesive
The method depends on the surface underneath.
Background | Removal method | Main risk |
|---|---|---|
Solid plaster or masonry wall | Wide scraper or shallow-angle chisel | Gouging or loosening old plaster |
Plasterboard | Careful hand scraping or board replacement | Tearing the paper and weakening the board |
Tile backer board | Scraping if the surface remains sound | Damaging the board or waterproofing layer |
Concrete floor | Floor scraper or controlled SDS chisel | Creating deep channels and excessive dust |
Timber floor or board | Careful hand removal or replacement of the board | Splitting or weakening the subfloor |
Do not attempt to make damaged plasterboard perfectly flat by grinding it. Replacing the affected board can be quicker and provides a stronger surface for new tiles.
Prepare the Surface for New Tiles
After removing the tiles and adhesive:
Remove loose material and remaining high spots.
Vacuum the surface using equipment suitable for fine construction dust.
Check walls and floors for movement, cracks or water damage.
Repair or replace damaged plasterboard and backer boards.
Fill or level minor surface defects using a suitable product.
Allow repairs to dry fully.
Apply primer if required by the adhesive manufacturer.
Install an appropriate tanking system in wet areas.
New tiles require a flat and stable background. Fresh adhesive will not correct a badly uneven wall or moving floor.
If you are planning the whole replacement job, our guide explaining how much it costs to tile a bathroom covers labour, materials, waterproofing and preparation.
Planning a Bathroom Renovation?
Estimate the cost of tile removal, preparation, new tiling and other bathroom work.
Calculate Your Bathroom Renovation Cost
How Much Does Bathroom Tile Removal Cost?
The following figures come from InstantCost's current UK bathroom tiling data.
Bathroom tiling work | Typical UK cost | What is included? |
|---|---|---|
Old wall tile removal | £10 to £20 per m² | Removing existing wall tiles before preparation |
Old floor tile removal | £150 to £400 for a standard bathroom | Lifting floor tiles and basic removal work |
Tanking wet areas | £200 to £400 | Waterproofing shower and bath areas before tiling |
Full bathroom wall and floor tiling | £1,000 to £3,000 | New tiling for a standard bathroom, depending on materials and layout |
Ask whether the quotation includes tile removal, adhesive removal, wall repairs, waterproofing and waste disposal. These items may be charged separately.
Severely damaged plasterboard, rotten flooring or failed waterproofing can increase the total because the surface must be repaired before new tiles are installed.
How Long Does Tile Removal Take?
A professional may remove the tiles from a standard bathroom in one day when the surfaces are straightforward. The job can take longer when:
Tiles cover every wall from floor to ceiling
Large porcelain tiles are strongly bonded
Floor adhesive needs powered removal
Bathroom fixtures must be disconnected first
Plasterboard or backer board needs replacing
There is hidden water damage
Access and waste removal are difficult
Surface repairs, drying and waterproofing add time before the new tiles can be fitted.
Can You Tile Over Existing Bathroom Tiles?
It is sometimes possible to tile over existing tiles if they are firmly bonded, flat, clean and capable of carrying the extra weight. However, this method is not suitable when:
Tiles are loose, cracked or hollow sounding
There is damp or mould behind the surface
The wall is already uneven
The additional thickness causes problems around doors or fittings
The background may not support the combined tile weight
The wet-area waterproofing is damaged or unknown
Removing the original tiles allows you to inspect the wall, repair water damage and install new waterproofing. This is normally the better option during a complete bathroom renovation.
How to Dispose of Old Bathroom Tiles
Broken tiles are heavy and sharp. Place them in strong rubble sacks without filling the sacks beyond a safe lifting weight.
Do not place a large quantity in an ordinary household bin. Check your local council's rules for disposing of tiles, ceramics, plasterboard and construction waste at a household waste recycling centre.
Plasterboard may need to be separated from other waste because some disposal sites handle gypsum products differently.
Safety Guidance
Protect your eyes, hands and lungs
Broken tiles have extremely sharp edges. Wear eye protection, heavy-duty gloves, covered clothing and safety footwear. Control dust instead of dry sweeping it through the room.
Tile, grout, mortar and adhesive dust may contain fine silica. The Health and Safety Executive construction dust guidance explains that common cutting, grinding and soft-strip tasks can create harmful dust.
Use suitable extraction when operating powered tools. Vacuum or use controlled wet-cleaning methods rather than sweeping fine dust with a dry broom.
Stop work if you discover damaged cables, leaking pipes, extensive mould or material that could contain asbestos. Older properties may require an asbestos survey before boards, coatings or unusual floor materials are disturbed.
Common Tile Removal Mistakes
Holding the chisel at a steep angle
A steep chisel angle directs force into the wall or floor. Keep it shallow so it moves behind the tile.
Starting beside plumbing
Do not break the first tile beside taps, shower controls or visible pipe routes. Choose a clear area away from services.
Trying to save badly damaged plasterboard
Hours spent scraping torn plasterboard may still leave a weak background. Replacing the damaged section can be faster and more reliable.
Removing tiles without protecting the bath
One falling porcelain tile can chip a bath or shower tray. Use rigid cardboard beneath the dust sheet.
Ignoring waterproofing
Grout and tiles do not create a fully waterproof shower enclosure. Damaged wet areas need an appropriate tanking system before retiling.
Using a powered chisel without checking for services
An SDS chisel removes material quickly but gives little time to react when it reaches a cable, pipe or heating system.
Frequently Asked Questions
What is the easiest way to remove bathroom wall tiles?
Start with a loose or cracked tile. Remove the surrounding grout, break the tile towards its centre and slide a wide chisel behind the remaining pieces at a shallow angle.
Can you remove tiles without damaging plaster?
Careful removal can limit damage, but it cannot guarantee that the plaster will remain perfect. Strong adhesive often pulls away weak or old plaster with the tile.
Can you remove tiles without damaging plasterboard?
Minor damage may be avoidable when the adhesive bond is weak. Firmly bonded tiles often tear the plasterboard paper or gypsum core, making board replacement necessary.
Do I need to remove old adhesive before retiling?
Yes. Remove loose adhesive and high spots so the background is stable and flat. Some surfaces may require repair, levelling, priming or replacement before new tiles can be fitted.
Should I remove the toilet before lifting floor tiles?
Removing the toilet normally gives a cleaner result and lets you inspect the floor around the waste pipe. Isolate the water supply and have a plumber disconnect it if you are not confident.
Can I use an SDS drill to remove bathroom tiles?
An SDS drill with a tile chisel can remove stubborn floor tiles and adhesive. Use it carefully and only after checking for pipes, cables and underfloor heating. It is often too aggressive for plasterboard walls.
Prepare Properly Before Retiling
Successful bathroom tile removal depends on preparation and control. Protect the bathroom suite, check for concealed services and start with a single tile away from plumbing and electrical fittings.
Work slowly until you understand how strongly the tiles are bonded and what condition the background is in. Replace damaged boards and waterproof wet areas properly before installing the new finish.
Estimate Your Bathroom Renovation Cost
Compare current UK costs for tile removal, waterproofing, new tiling and bathroom fitting.