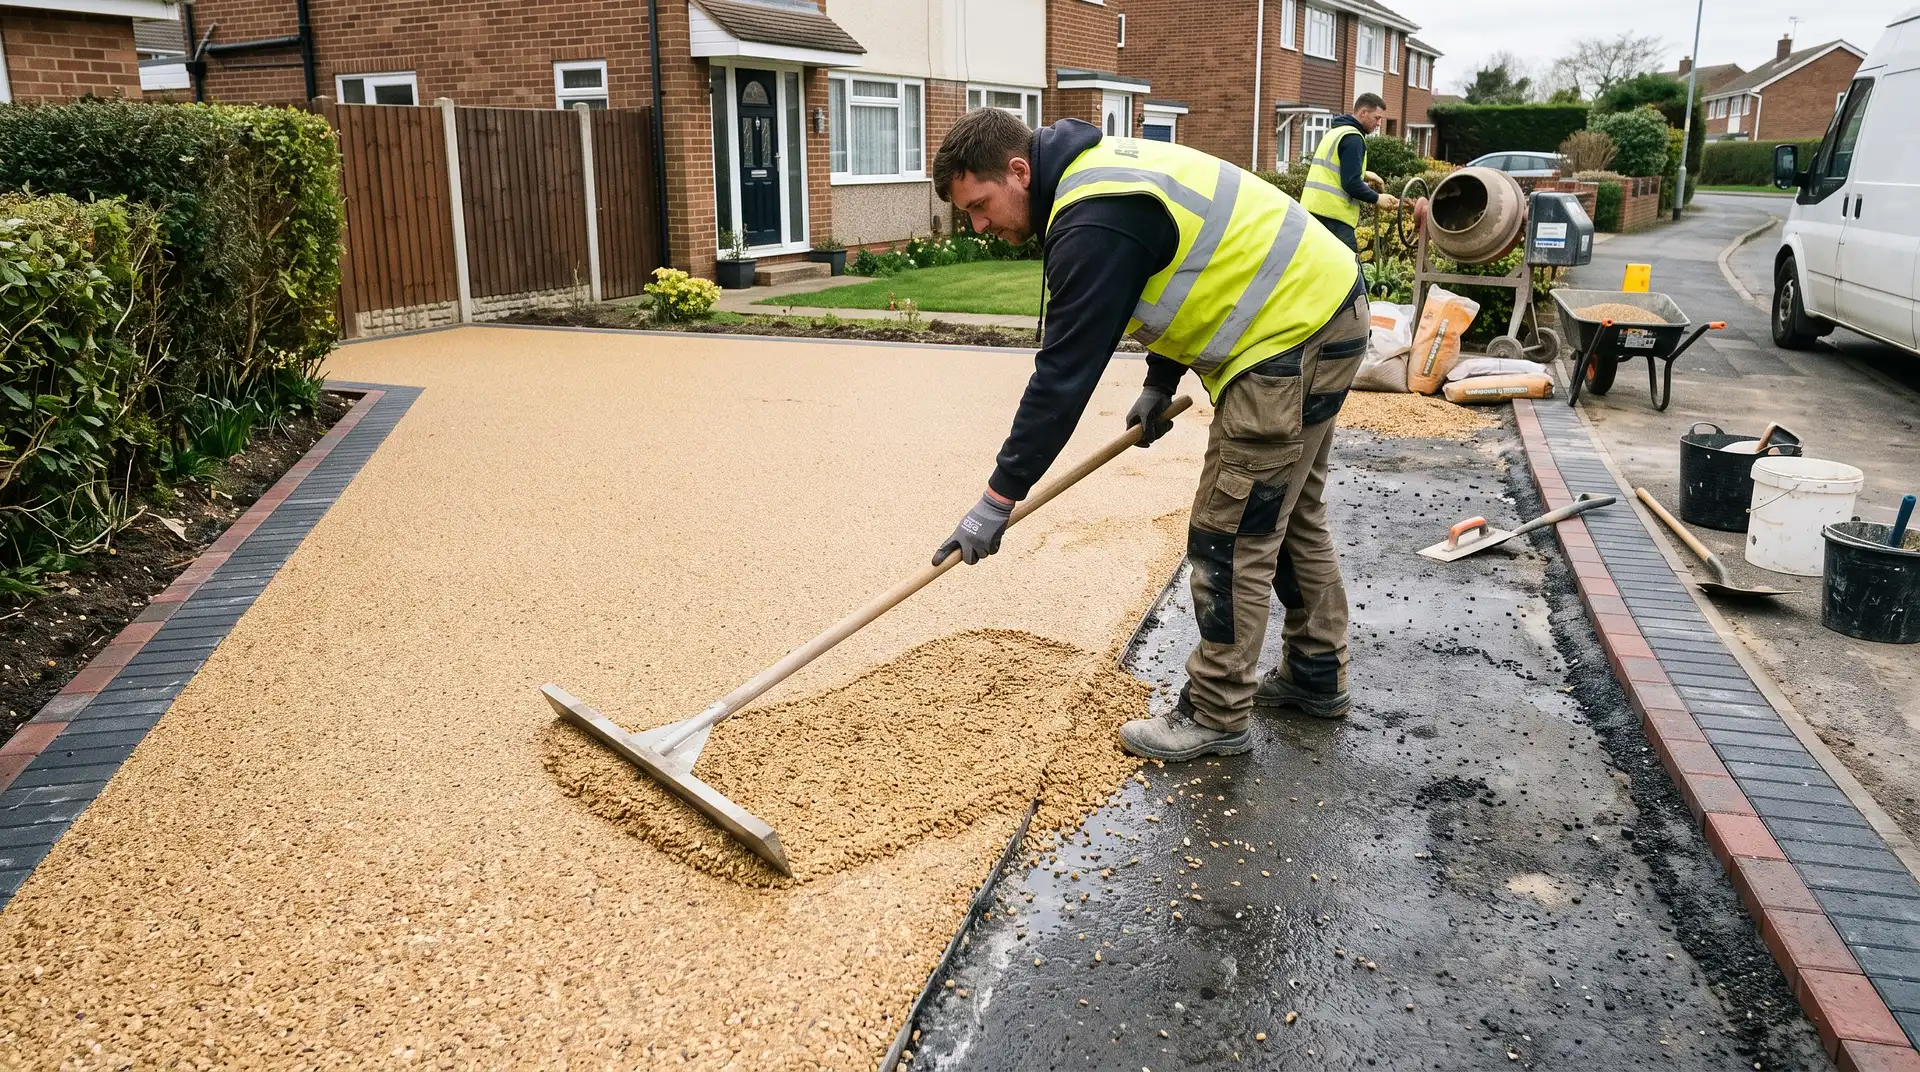
How to Lay a Resin Driveway
6 October 2026
How to Lay a Resin Driveway
A resin bound driveway is made by mixing dried aggregate with resin, spreading the mixture over a properly prepared base and trowelling it to create a smooth, permeable surface. A long-lasting result depends more on the ground preparation, drainage, base strength and mixing process than on the resin surface alone.
Resin driveway installation is skilled work. The resin starts to cure once the components are mixed, so the aggregate must be measured accurately and laid quickly in suitable weather. A small patio may be manageable for an experienced DIY installer, but most domestic driveways are best completed by a specialist contractor.
Quick answer: To lay a resin driveway, excavate and compact the ground, install suitable drainage and edging, build a stable base, allow it to cure, mix the resin and aggregate thoroughly, then spread and trowel the mixture to the required depth. The finished surface normally needs at least 18mm for vehicle use.
Resin Bound and Resin Bonded Driveways
Resin bound and resin bonded surfaces are different products.
Resin bound: The aggregate is mixed with resin before it is spread. The result is a smooth, even and usually permeable surface.
Resin bonded: Resin is applied to the base first and loose stones are scattered over it. The finish looks more like loose gravel and is not normally fully permeable.
This guide focuses on resin bound driveways because they are the type most people mean when they ask how to lay a resin driveway.
What You Need to Lay a Resin Driveway
Resin-bound aggregate in the chosen colour and size
UV-stable resin suitable for outdoor vehicle areas
Accurate weighing scales
Forced-action resin mixer
Clean buckets and mixing tools
Wheelbarrow
Steel trowels and lute
Gloves, safety footwear, eye protection and suitable work clothing
Edging restraints
Plate compactor or vibrating roller
String line, spirit level and measuring tools
Temporary barriers and warning signs
Do not rely on a normal cement mixer unless the resin system manufacturer specifically approves it. Resin bound mixtures need thorough, consistent mixing to prevent weak patches and colour variation.
How to Lay a Resin Bound Driveway Step by Step
1. Measure the driveway
Measure the length and width of the area and calculate the square metreage. Include separate measurements for paths, turning areas and parking bays. The aggregate and resin supplier can then calculate the correct number of mixes.
2. Check levels and drainage
Decide where rainwater will go before excavation begins. The surface should fall away from the building and must not direct water towards a neighbouring property. Check door thresholds, garage entrances, kerbs, drains and nearby walls so the finished level does not create a trip hazard or damp problem.
3. Check planning requirements
In England, a front driveway over 5 square metres made with an impermeable surface may need planning permission unless rainwater is directed to a permeable area. The GOV.UK guidance on permeable front garden surfacing explains the main rules. Check with your local planning authority if the property is listed, in a conservation area or beside a classified road.
4. Excavate the existing ground
Remove turf, soil, old paving and weak material to the depth needed for the full driveway build-up. The required excavation depends on the soil, expected vehicle loads and the selected base construction. Remove soft spots rather than covering them, because movement below the surface can cause cracks and depressions later.
5. Compact the subgrade
Level the exposed ground and compact it with a suitable vibrating plate. If the ground remains soft after compaction, it may need additional excavation, geotextile separation or a redesigned base. Do not lay resin over muddy, wet or unstable ground.
6. Install the edging
Fit block paving, kerbs, metal edging or another firm restraint around the driveway. Resin bound surfacing needs a secure edge to contain the mixture and protect it from damage during use. Set the edging to the finished level and check that it follows the planned falls.
7. Build the sub-base
Install a suitable compacted sub-base, commonly a free-draining Type 3 material where permeability is required. The base should be laid in manageable layers and compacted thoroughly. The correct depth depends on the soil and loading, but many vehicle driveways require a substantial sub-base rather than a thin layer of stone.
For a non-permeable system over an existing concrete or tarmac base, the surface must be sound, clean, correctly levelled and free from movement. Cracked or sinking tarmac should be repaired or removed before resin is considered.
8. Install the base surface
A resin bound driveway may be laid over a suitable porous macadam or another approved base. Allow the base to cure and dry fully before applying the resin mixture. Never cover a damp base because trapped moisture can affect adhesion and produce cloudy or loose areas.
9. Protect drains and fixed objects
Cover drain openings, inspection covers, walls, door thresholds and other areas that must remain free of resin. Mark the working area clearly and keep pets, children and vehicles away from the site.
10. Check the weather
Choose a dry period with stable temperatures. Rain, frost, high humidity and very hot weather can affect mixing, working time and curing. Follow the resin manufacturer’s temperature and moisture limits rather than relying only on the weather forecast.
11. Mix the resin and aggregate
Measure every component accurately. Add the aggregate and resin in the order specified by the system manufacturer, then mix until every stone is evenly coated. Poor mixing can leave dry stones, soft patches, colour differences and premature failure.
Each batch should use the same ratios and mixing time. Keep batches consistent so the finished driveway does not show visible changes in shade or texture.
12. Spread the mixture
Tip the mixed material onto the prepared base and spread it with a lute or rake. Work in sections and keep the depth consistent. Do not add water to make the material easier to spread.
13. Trowel the surface
Use a clean steel trowel to compact and smooth the resin bound mixture. Apply steady pressure without pulling stones out of the mix. Clean the trowel regularly so resin does not drag across the surface.
14. Finish edges and joins
Complete each section neatly against the edging and plan joins before the material starts to cure. Keep joins straight where possible and avoid stopping in the middle of a visible parking area.
15. Allow the driveway to cure
Keep people, pets and vehicles off the driveway for the time stated by the resin manufacturer. The curing period varies with the resin system and weather. Do not remove barriers early because footprints, tyre marks and dropped objects can permanently damage the surface.
Compare resin driveway installation costs
Check the latest UK driveway prices, groundwork costs and optional extras with the InstantCost calculator.
How Thick Should a Resin Driveway Be?
A resin bound driveway for cars is commonly laid at around 18mm over a suitable base. Paths and patios may use a thinner layer, depending on the product and expected load. A thicker surface cannot compensate for a weak or moving sub-base, so the complete construction must be designed together.
Always follow the resin manufacturer’s specification. Aggregate size, traffic levels, base type and drainage requirements can change the recommended depth.
Can You Lay Resin Over Existing Tarmac or Concrete?
Resin can sometimes be laid over existing tarmac or concrete, but the base must be stable, clean, dry and free from significant cracks. Any movement below the surface can transfer into the resin finish.
Existing concrete may also create a non-permeable system. If the driveway is in a front garden, check whether rainwater will drain to a lawn, border, soakaway or other suitable permeable area.
How Much Does a Resin Driveway Cost in the UK?
InstantCost’s current UK driveway calculator places a professionally supplied and fitted resin bound driveway at approximately £130 per square metre. A 40 square metre driveway could therefore be around £5,200 before unusual groundwork, drainage, access restrictions or decorative edging are added.
Driveway item | Indicative InstantCost guide |
|---|---|
Resin bound driveway | About £130 per square metre supplied and fitted |
40 square metre resin driveway | About £5,200 before site-specific extras |
Extra excavation or weak ground repairs | Quoted after a site assessment |
Drainage, edging and access work | Varies by property and design |
Use the InstantCost driveway calculator for a more relevant estimate based on driveway size, material, region and optional work.
When Should You Use a Resin Driveway Specialist?
Use a specialist if the driveway needs excavation, drainage, a new sub-base, kerb work or a large resin surface. Professional installation is also advisable when the site has clay soil, standing water, steep levels, heavy vehicles or difficult access.
A contractor should explain the proposed base, resin depth, aggregate mix, drainage design, curing time and guarantee. Ask for a written quotation that separates groundwork from the resin surface so you can compare like-for-like proposals.
Common Resin Driveway Installation Mistakes
Laying resin over a weak or damp base
Using the wrong aggregate or resin ratio
Failing to install firm edge restraints
Ignoring drainage and surface water routes
Mixing batches inconsistently
Working during rain, frost or extreme heat
Making the surface too thin for vehicle traffic
Allowing vehicles onto the surface before it has cured
Covering cracks in an unstable existing driveway
Leaving the finished surface without maintenance or cleaning
Frequently Asked Questions
Can I lay a resin driveway myself?
Small resin bound areas may be possible for an experienced DIY installer, but a full driveway requires accurate ground preparation, mixing and trowelling. Mistakes are expensive to correct, so a specialist is usually the safer option.
How long does it take to lay a resin driveway?
The resin surface may be laid in a day on a prepared base, but excavation, drainage and base construction can add several days. Weather and access can also affect the programme.
How long before you can drive on a new resin driveway?
Follow the resin manufacturer’s curing instructions. The surface may need at least 24 hours for light use and longer in cool or damp weather. Do not drive on it until the installer confirms that it has cured sufficiently.
Does a resin driveway need planning permission?
Permeable front driveway designs often avoid the need for planning permission, but local restrictions can apply. An impermeable front driveway over 5 square metres may require permission unless water is directed to a suitable permeable area.
What base is best for a resin bound driveway?
The best base depends on the ground, drainage design and expected traffic. A properly compacted, stable and approved porous base is commonly used for a permeable resin bound driveway.
How long does a resin driveway last?
A properly designed and installed resin bound driveway can last around 20 to 25 years in the UK. Its lifespan depends on base quality, drainage, traffic, maintenance and the resin system used.
Plan your driveway budget
Get a current resin driveway estimate before requesting quotes from local installers.