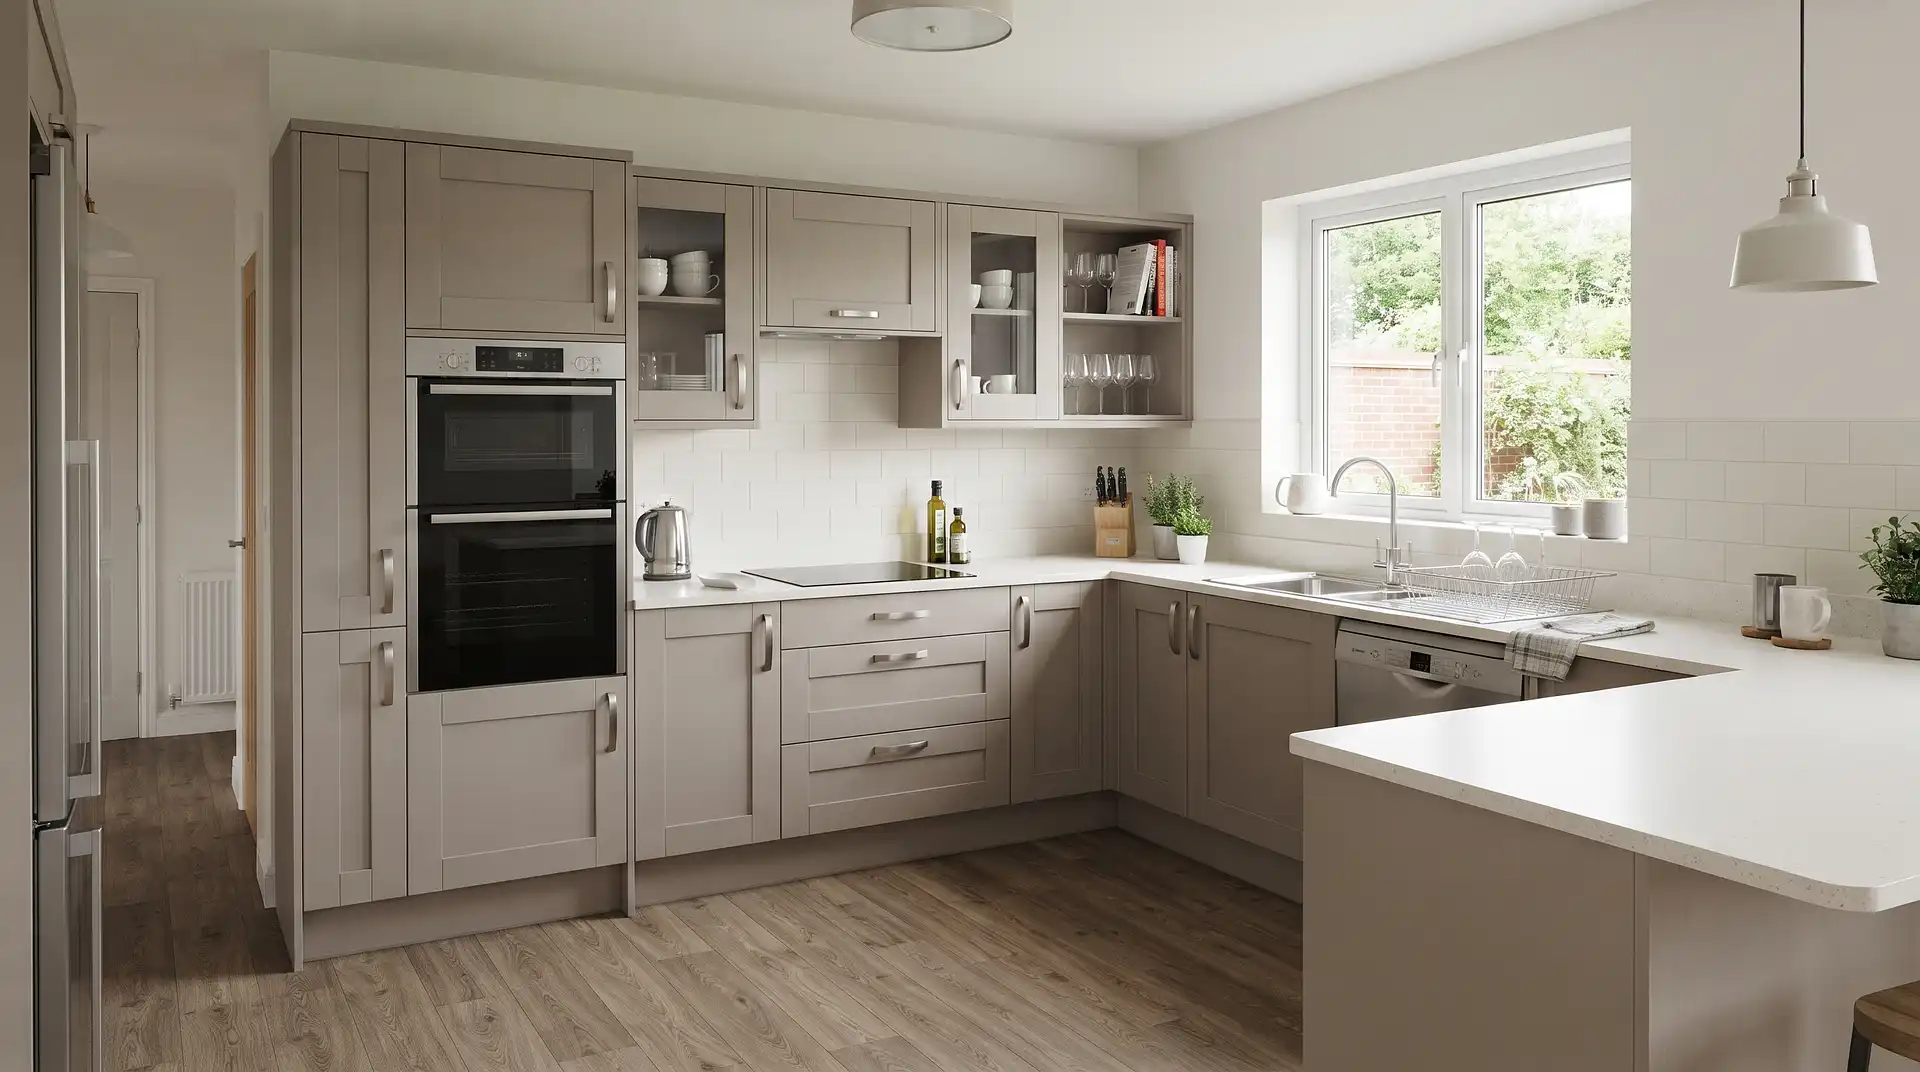
How to Arrange Cabinets in a Kitchen
4 October 2026
How to Arrange Cabinets in a Kitchen
Arrange kitchen cabinets around the way food moves through the room. Position food storage near the fridge, keep the main preparation space between the sink and hob, place the dishwasher beside the sink and store pans near the cooking area. Group tall cabinets together where possible, protect useful worktop space and check that every door, drawer and appliance can open without blocking another one.
Quick answer: Start with the fixed features, including doors, windows, water, gas, sockets and waste pipes. Position the fridge, sink and hob, then arrange cabinets into food storage, preparation, cooking and cleaning zones. Plan base units before wall units, keep drawers near the main preparation area and leave enough space for appliance doors, cabinet handles and people to pass safely.
A good kitchen arrangement should make everyday tasks feel simple. You should be able to take food from the fridge, wash it, prepare it and move it to the hob without repeatedly crossing the room or walking around an island.
The traditional kitchen work triangle connects the fridge, sink and hob. It remains a useful starting point, but modern kitchens often work better when they are divided into zones. This is particularly true when two people cook together or when the kitchen also serves as a dining, homework and social space.
Measure the Kitchen Before Arranging Cabinets
Measure the complete room before choosing cabinets. Record the width and height of every wall, then mark all fixed features on a scaled plan.
Your measurements should include:
Doors and the direction in which they open
Windows, including sill height
Alcoves, chimney breasts and boxed pipework
Water supply and waste connections
Gas supply position
Electrical sockets, switches and consumer-unit access
Extractor ducts and ventilation openings
Boilers, radiators and heating controls
Ceiling height and any sloping sections
Uneven walls and corners that are not square
Measure each wall at floor, worktop and wall-cabinet height. Older UK homes rarely have completely straight walls. A difference of a few centimetres can affect whether the final cabinet, filler panel or freestanding appliance will fit.
Check the appliance installation dimensions as well as the visible width. A nominal 600 mm appliance may require additional ventilation, door clearance or space for pipes and plugs.
Choose the Best Kitchen Layout
One-Wall Kitchen
A one-wall arrangement suits studios, compact flats and open-plan rooms. Place the fridge at one end, the sink near the centre and the hob towards the other end. Preserve a useful section of uninterrupted worktop between the sink and hob.
Avoid placing tall units in the middle of the run because they divide the worktop and make the room feel more cramped. Group the fridge, oven housing and larder at one end where possible.
Galley Kitchen
A galley kitchen uses two opposing cabinet runs. It provides plenty of storage and worktop in a narrow room, but the walkway must remain clear when drawers and appliance doors are open.
Keep the sink and hob on the same side when possible. This reduces the need to carry hot pans across the central walkway. Position the fridge where another person can reach it without entering the main cooking area.
L-Shaped Kitchen
An L-shaped layout places cabinets along two adjoining walls. It works well in small and medium rooms because it leaves the remaining floor area open for a table or movement.
The corner needs careful planning. A practical corner cabinet, carousel or pull-out mechanism can make the space accessible. Alternatively, accepting a small amount of inaccessible corner space may allow wider drawers on both cabinet runs.
U-Shaped Kitchen
A U-shaped arrangement provides three cabinet runs and a large amount of worktop. It suits a dedicated kitchen where the room is wide enough to prevent the opposing cabinets from feeling restrictive.
Avoid filling every wall with tall cabinets. Too many full-height units can make the centre feel enclosed and reduce useful preparation space.
Kitchen With an Island
An island can provide preparation space, storage and seating, but only when the room has sufficient clearance. It should improve the route between important zones rather than become an obstacle in the middle of them.
Aim for approximately 1,000 mm of clear space around a working island. A busier two-cook kitchen or an area containing opposing appliances may benefit from about 1,200 mm. Test the layout using the actual depth of handles, open doors and pull-out drawers.
If the available clearance is tight, a narrow peninsula or movable preparation table may work better than a fixed island.
Plan Kitchen Cabinets Around Work Zones
Food Storage Zone
Position the fridge, freezer, larder cabinet and dry-food cupboards close together. This allows shopping to be put away without carrying items through the whole kitchen.
The fridge should be accessible without forcing someone to walk through the main cooking zone. In a family kitchen, placing it near the entrance can let people collect drinks and snacks without disturbing the cook.
Allow the fridge doors and drawers to open fully. A fridge placed tightly against a wall may need a filler panel so its door can open far enough for internal drawers to slide out.
Preparation Zone
The main preparation zone needs clear worktop, convenient drawers and access to the sink, fridge and bin. The section between the sink and hob is often the most useful preparation area.
Place cutlery, knives, chopping boards, mixing bowls and everyday utensils in drawers beneath or beside this worktop. A pull-out bin below the preparation area makes it easier to clear peelings and packaging without crossing the kitchen.
Do not divide the main preparation surface with a tall unit, countertop appliance garage or full-height oven housing.
Cooking Zone
Arrange the cooking zone around the hob and oven. Store pans, oven trays, cooking utensils, oils and commonly used ingredients within easy reach.
Wide drawers are often more practical than deep cupboards for pans because the contents can be seen and reached without removing items from the front.
Leave usable worktop beside the hob so hot pans can be put down safely. Do not position the hob tightly against a tall cabinet, side wall or end panel unless the appliance manufacturer permits it and the required clearances are maintained.
Cleaning Zone
The cleaning zone should contain the sink, dishwasher, waste storage and cleaning supplies. Place the dishwasher directly beside the sink when possible. This keeps the water connection short and allows plates to be scraped, rinsed and loaded in one place.
Check the open dishwasher door does not block the main walkway, trap someone in a corner or prevent access to the sink. Store everyday plates, bowls and glasses near the dishwasher so unloading requires fewer steps.
Where to Position Base Cabinets
Plan base cabinets first because they determine the worktop shape, appliance spaces and working route. Once the base layout works, wall cabinets can be arranged above it.
Common UK cabinet ranges include several widths, often starting at about 300 mm and increasing through 400, 500, 600, 800, 900 and 1,000 mm options. Available dimensions vary by manufacturer, so use the exact technical drawings for your chosen range.
Arrange base units in the following order:
Place the sink and major appliances.
Set the corner cabinets and calculate the required corner voids.
Add wide drawer units near the preparation and cooking zones.
Position the bin near the sink or preparation area.
Use standard cupboards to fill the remaining useful spaces.
Add filler panels where doors and drawers need clearance.
Confirm the end-panel thickness before finalising the total run.
A narrow cabinet is sometimes useful for trays, chopping boards or bottles, but adding several small units increases the number of doors and reduces usable internal space. Wider drawer units often provide better storage in a simple modern layout.
How to Arrange Wall Cabinets
Wall cabinets should support the work zones below without making the worktop feel enclosed. Keep everyday crockery close to the dishwasher, cooking ingredients near the preparation area and occasional items on higher shelves.
Aligning wall cabinet edges with the base units below can create a tidy appearance, but function should come first. Wall and base units do not need to match width throughout the entire kitchen.
Consider the following points:
Leave sufficient working space between the worktop and wall cabinets.
Follow the hob and extractor manufacturers’ minimum clearances.
Do not place a standard cupboard where it interferes with cooker extraction.
Check that cabinet doors do not hit pendant lights, walls or neighbouring units.
Avoid making frequently used shelves too high for the household.
Use the space above the fridge only for items that are not needed every day.
Taking cabinets close to the ceiling can provide additional storage and reduce the dust-catching gap above them. However, the top shelves will be difficult to reach and may require safe step access.
Where to Place Tall Cabinets
Tall cabinets include fridge housings, oven housings, larder units and utility cupboards. Grouping them at one end of the kitchen can create a clean storage wall while protecting the main worktop.
Avoid placing a tall unit between the sink and hob because it interrupts the preparation route. It can also block light and make the worktop on either side feel disconnected.
When positioning a tall oven housing:
Choose a safe and comfortable oven height.
Provide nearby worktop for hot trays.
Check that the oven door can open without obstructing a walkway.
Follow ventilation and heat-clearance instructions.
Avoid placing the housing where its door collides with an island or corner unit.
Calculate Your Kitchen Renovation Cost
Select your kitchen size, cabinet type, appliances and location to see a current UK cost estimate.
How to Position Kitchen Appliances
Fridge and Freezer
Place the fridge near food storage and within easy reach of the main preparation worktop. Leave the manufacturer’s ventilation space and check which way the doors open.
Do not assume an integrated appliance uses the same cabinet as a freestanding model. Integrated fridge and freezer housings have specific ventilation and door-fitting requirements.
Hob
Position the hob where extraction can be installed correctly. Avoid placing it immediately beside a doorway, at the end of a cabinet run or beneath an opening window.
Keep a landing area on both sides. Check the required distance from wall units, tall cabinets, splashbacks and the extractor in the hob manufacturer’s instructions.
Oven
An under-counter oven keeps the arrangement simple and preserves tall storage. A built-in oven at a comfortable height may be easier to use, but it needs a tall housing and a nearby worktop for hot cookware.
Make sure the open oven door does not obstruct the main route through the kitchen.
Sink
The sink is often positioned near the existing water and waste connections because moving drainage can add cost and installation complexity. A window position can work well, but check that the tap will not prevent the window from opening.
A sink placed tightly in a corner can be uncomfortable to use and may interfere with adjacent drawers. Allow enough space for shoulders, tap controls and draining.
Dishwasher
Place the dishwasher beside the sink. Check that its open door will not clash with the sink cabinet, corner handle, opposite cabinet or kitchen entrance.
If the dishwasher is across the room from the sink, wet plates and cutlery must be carried across the floor, and longer plumbing connections may be required.
Washing Machine
If there is no separate utility room, position the washing machine near suitable water and drainage connections. Avoid placing it where vibration can affect poorly supported cabinets or where the open door blocks a narrow walkway.
Microwave
Place the microwave at a height that allows hot food to be removed safely. An appliance positioned too high can make hot containers difficult to see and handle.
Follow the ventilation requirements for built-in models. A freestanding microwave should not be enclosed in an ordinary cabinet unless the manufacturer confirms that arrangement is suitable.
How to Arrange Corner Cabinets
Corner cabinets can provide storage, but they can also consume space that is difficult to reach. Decide how the corner will work before adding the neighbouring units.
Common options include:
A corner carousel
A pull-out corner mechanism
A blind corner cupboard
Corner drawers
An inaccessible corner void with wider drawers on each run
A complicated mechanism is not automatically the best choice. Compare how much usable storage it provides, how easily it can be repaired and whether the door clears nearby handles and appliances.
Include the manufacturer’s required corner post or blanking panel. Two ordinary cabinets cannot simply be pushed into a corner without considering door and drawer clearance.
Allow Space for Fillers and End Panels
Cabinet plans often fail because every millimetre is assigned to a unit. Real kitchens need filler panels to deal with uneven walls, handles and door movement.
Use fillers where:
A cabinet meets a wall
A drawer needs clearance from a door frame
A fridge door must open beyond 90 degrees
Two cabinet runs meet at a corner
A handle could strike the neighbouring unit
A wall is not straight
Decorative end panels also add width to a run. Include them in the measurement before ordering the cabinets and worktop.
How to Arrange Cabinets in a Small Kitchen
In a small kitchen, preserve clear worktop and avoid unnecessary changes in depth or height. A simple cabinet run usually feels calmer and provides more useful storage than several small decorative units.
Useful small-kitchen choices include:
Wide drawers instead of deep shelves
A tall larder at the end of a run
Wall cabinets extending towards the ceiling
Pull-out storage in narrow spaces
An integrated bin beneath the preparation area
A compact dishwasher where suitable
A peninsula instead of a full island
Open wall space around windows to preserve natural light
Do not add an island simply because it fits on a drawing. Mark its full size on the floor with masking tape, then open nearby doors and walk around it. The kitchen must still work when several cabinets and appliances are open.
Plan Cabinet Storage Before Ordering
Make a list of what the kitchen needs to store and assign each category to a cabinet on the plan. This exposes missing storage before the order is placed.
A practical arrangement may include:
Cutlery and utensils below the main preparation area
Pans and trays beside the hob or oven
Crockery between the dishwasher and dining area
Glasses close to the sink or drinks area
Dry food beside the fridge
Cleaning products in a secure cupboard near the sink
Recycling and waste below the preparation area
Occasional appliances in a tall or less accessible cupboard
Once the cabinets have been installed, the related guide on how to organise kitchen cupboards explains how to assign shelves and drawers according to use and frequency.
Test the Kitchen Layout Before Ordering
Review the plan at full scale before paying a deposit. Use masking tape to mark base units, tall cabinets and an island on the floor. Cardboard can represent open appliance doors.
Walk through common tasks:
Bring shopping into the kitchen and put it away.
Take food from the fridge and place it on the preparation surface.
Move from the preparation area to the sink and hob.
Open the dishwasher while standing at the sink.
Remove a hot tray from the oven and place it on a worktop.
Open opposite drawers and appliances.
Let a second person walk through while you stand at the hob.
Check the final plan against the appliance technical drawings. Confirm every service position with the relevant installer before cabinets are manufactured or ordered.
Kitchen Cabinet and Renovation Costs
InstantCost’s current 2026 UK kitchen pricing gives the following guide figures:
Kitchen item or project | Typical UK cost |
|---|---|
Flat-pack cabinet, fitted | £150 to £350 per unit |
Rigid mid-range cabinet, fitted | £300 to £600 per unit |
Bespoke handmade cabinet | From £900 per unit |
Small flat-pack kitchen | £5,000 to £8,000 |
Mid-range standard kitchen | £8,000 to £15,000 |
High-end kitchen | £15,000 to £25,000 |
Bespoke handmade kitchen | £25,000 to £60,000 or more |
The cabinet arrangement affects the price. Corner mechanisms, unusually narrow units, appliance housings, decorative end panels and bespoke fillers can cost more than a simple run of standard cabinets.
Keeping the sink, hob and major appliances close to their existing service positions can reduce plumbing, gas and electrical alterations. Final prices also depend on the kitchen size, region, worktop and appliance specification.
Kitchen Cabinet Safety and Compliance
Cabinets must be fixed to a suitable structure using fixings appropriate for the wall. Heavy wall cabinets should not rely on weak plasterboard or unknown fixings. Locate cables and pipes before drilling.
Follow the appliance manufacturer’s clearances, ventilation requirements and installation instructions. Do not enclose a fridge, oven, boiler or microwave in an unsuitable cabinet.
Retain suitable kitchen ventilation when changing the cabinet layout. In England, the current Approved Document F ventilation guidance explains how Part F of the Building Regulations applies to dwellings. Scotland, Wales and Northern Ireland have their own requirements, so check the rules that apply where the property is located.
Gas pipes, connections and gas hobs must only be worked on by an appropriately qualified Gas Safe registered engineer. Electrical alterations should be completed and certified by a competent electrician where required.
Do not position handles, open doors or projecting worktops where they create a hazard beside an entrance. Keep the hob away from curtains, opening windows and busy routes through the room.
Common Kitchen Cabinet Layout Mistakes
Planning Cabinets Before Appliances
Appliances have specific dimensions, ventilation needs and door movements. Choose or shortlist them before finalising the surrounding cabinets.
Putting the Dishwasher Too Far From the Sink
This creates an awkward cleaning route and may require unnecessarily long plumbing connections. Place it directly beside the sink where possible.
Leaving No Worktop Beside the Hob or Oven
You need somewhere safe to place hot pans and oven trays. Protect landing space when positioning tall cabinets and appliances.
Ignoring Open Doors
A plan can look spacious while every door is closed. Check dishwasher, oven, fridge, drawer and cabinet movement at full scale.
Using Too Many Narrow Cabinets
Several small units create more doors, hinges and side panels while providing less efficient internal storage. Use wider drawers where the layout permits.
Forgetting Filler Panels
Cabinets placed directly against a wall may not open correctly. Allow fillers for handles, uneven walls and full appliance-door movement.
Installing an Island in a Tight Room
An island that restricts movement makes the kitchen harder to use. Test the full footprint and door clearances before committing to it.
Breaking Up the Main Preparation Area
A tall cabinet or countertop appliance in the middle of the main worktop interrupts food preparation. Keep one useful stretch of worktop clear.
Frequently Asked Questions
What is the best way to arrange kitchen cabinets?
Arrange them around food storage, preparation, cooking and cleaning zones. Keep the fridge and larder together, drawers beneath the main preparation surface, pans near the hob and the dishwasher beside the sink.
Should the sink or hob go in the centre of the kitchen?
Neither must be exactly central. Position them to create a safe working route and useful worktop between them. The sink also needs practical water and waste connections, while the hob needs suitable extraction and landing space.
Where should drawers go in a kitchen?
Place cutlery and preparation tools beneath the main worktop. Store pans and cooking utensils beside the hob, and use deep drawers for bowls, plates or small appliances where appropriate.
Should tall kitchen units be grouped together?
Grouping tall cabinets can create a clean storage wall and preserve uninterrupted worktop. Avoid placing a tall unit between the sink and hob or where it blocks natural light.
How much space should be left around a kitchen island?
Approximately 1,000 mm is a useful starting point for a working aisle. Around 1,200 mm may be more comfortable where two people cook or appliances open opposite the island. Test the actual doors, handles and household needs.
Should the dishwasher be on the left or right of the sink?
Either side can work. Choose the side that suits the user, plumbing and unloading route. The open dishwasher door should not block the main walkway or prevent access to another appliance.
Plan a Kitchen That Fits Your Budget
Compare current kitchen costs by cabinet type, project size, appliances and UK region.