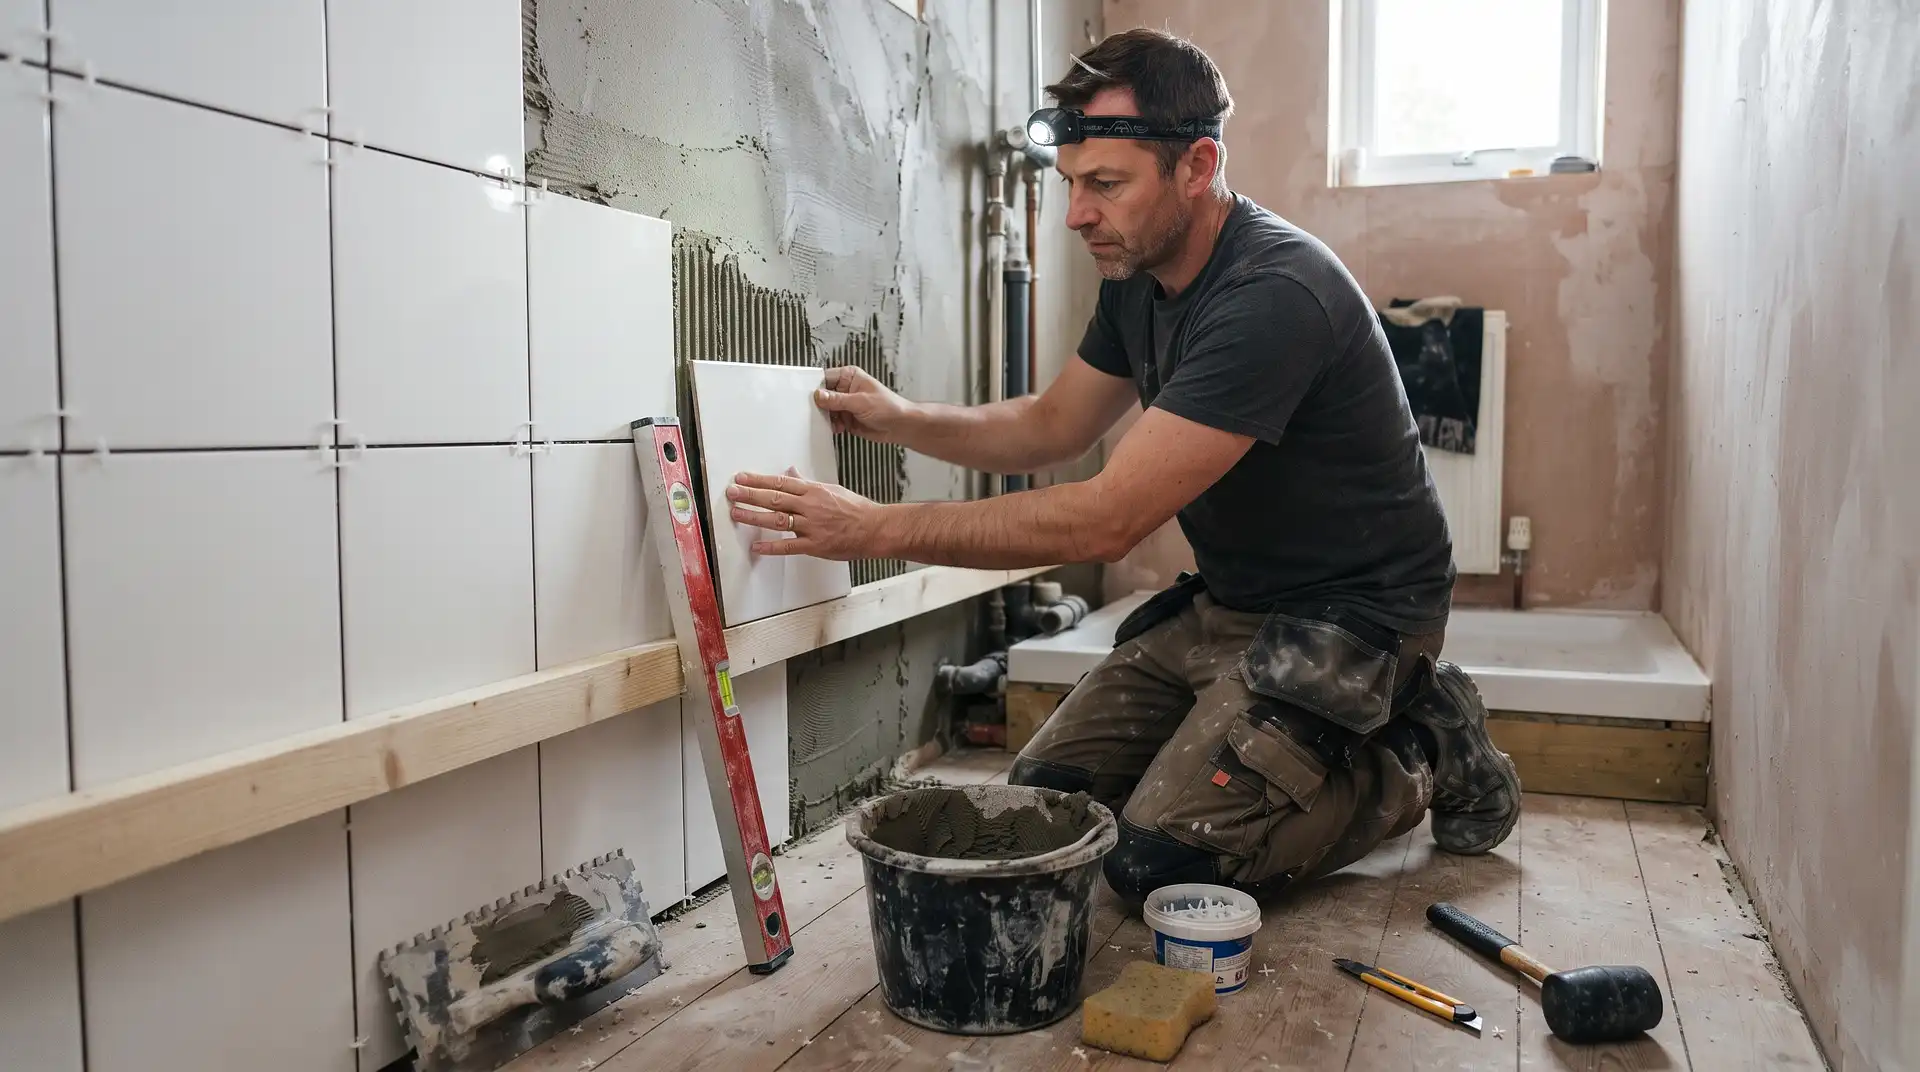
How to Tile a Bathroom Wall
4 October 2026
How to Tile a Bathroom Wall
To tile a bathroom wall, first make sure the surface is flat, dry and strong enough to support the tiles. Waterproof the shower or bath area with a compatible tanking system, mark a level starting line and plan the layout so you do not finish with narrow tile cuts. Apply the correct adhesive with a notched trowel, press each tile firmly into place and use spacers to keep the joints even. After the adhesive has cured, grout the tile joints and seal corners, edges and sanitary fittings with bathroom silicone.
Quick answer: Prepare and waterproof the wall, mark a level datum line, fix a straight batten and apply tile adhesive in small sections. Install the tiles with spacers, check each row with a spirit level and cut the edge tiles to fit. Allow the adhesive to cure before grouting, then use sanitary silicone at corners and where the tiles meet the bath, shower tray or basin.
Tiling a plain bathroom wall can be a manageable DIY project. A shower enclosure, wet room or wall containing several pipes, niches and controls requires more care. The quality of the finished wall depends heavily on the preparation underneath it. Tiles will not straighten a badly uneven wall, and grout will not make a shower waterproof.
What You Need to Tile a Bathroom Wall
Bathroom wall tiles
Adhesive suitable for the tiles and wall background
Compatible wall primer where required
A complete tanking or waterproofing system for wet areas
Tile spacers or levelling clips
Notched trowel of the correct size
Mixing bucket and drill mixer for powdered adhesive
Spirit level or laser level
Tape measure, pencil and straight edge
Timber batten and suitable fixings
Manual tile cutter
Wet tile saw or suitable diamond cutting tool where required
Diamond hole saw for pipes
Tile file or rubbing stone
Grout, grout float and grout sponge
Tile trim for exposed external edges
Sanitary bathroom silicone
Eye protection, gloves and suitable dust control
Use products that are compatible with one another. The wall background, primer, tanking membrane, adhesive, grout and tile type all affect which system is suitable. Check the manufacturer’s instructions instead of mixing products based only on colour or price.
Can You Tile a Bathroom Wall Yourself?
You can tile a straightforward bathroom wall yourself if the surface is sound and you are comfortable measuring, cutting tiles and working accurately. Small ceramic wall tiles in a simple straight layout are generally easier for a beginner than heavy porcelain, natural stone, mosaics or large-format tiles.
Consider using a professional tiler when:
The wall is badly bowed, cracked or damaged by water
You are constructing a wet room or walk-in shower
The tiles are unusually heavy or large
The design includes several niches, mitred corners or patterned cuts
There are concealed leaks or damaged boards
Electrical fittings must be moved or altered
You are unsure how to waterproof the wet area
Choose the Correct Bathroom Wall Tiles
Ceramic wall tiles are a practical choice for many bathrooms because they are relatively light and easy to cut. Porcelain is denser and usually harder to drill or cut, so it may require diamond tools and a stronger adhesive.
Natural stone can need sealing before and after installation. It may also react with acidic cleaners or certain grouts. Check the supplier’s installation and maintenance instructions before buying it.
A floor tile can sometimes be installed on a wall, but its weight must be suitable for the wall background and adhesive system. Do not assume that plaster, plasterboard or tile backer board can carry any tile simply because the tile is sold for bathrooms.
Calculate How Many Tiles You Need
Measure the height and width of each wall in metres, then multiply the two measurements to find the square metre area.
Wall width × wall height = wall area in square metres
Subtract large openings only when they remove a meaningful amount of tiled area. Small windows and recesses often require additional cutting, so subtracting every opening can leave you short of tiles.
Add around 10% for cuts, breakages and future repairs. A diagonal, herringbone or complicated patterned layout may require about 15% extra. Check that every box has the same batch number because shade and size can vary between manufacturing batches.
Prepare the Bathroom Wall Before Tiling
Remove the Old Finish
Remove wallpaper, loose paint, damaged plaster, old adhesive and anything that may prevent the new adhesive from bonding. Existing tiles should only remain if they are completely secure, flat, clean and approved as a background by the new adhesive manufacturer.
Tiling over old tiles adds weight and thickness. It can create problems around doors, taps, shower controls, bath edges and window reveals. It may also hide damaged grout or moisture behind the original finish.
Check for Damp and Leaks
Do not tile over an active leak, mould growth or a wall that remains damp. Find and repair the cause first. Check pipe connections, shower valves, bath seals and the room above or behind the affected wall.
Soft plasterboard, swollen timber, crumbling plaster and persistent staining can indicate water damage. Replace damaged material and allow the structure to dry before installing the new waterproofing and tiles.
Make the Wall Flat
Place a long spirit level or straight edge against the wall in several directions. Fill small defects with a product approved for tiling. Substantial bows or damaged sections may require new plaster, render or tile backer board.
A flat wall is especially important for large-format tiles. Adhesive should not be used to compensate for a badly uneven surface unless the product is specifically designed and applied for that purpose.
Allow Fresh Plaster to Dry
Fresh plaster must dry properly before it is primed or tiled. The required drying time depends on the thickness, ventilation and product used. Follow the plaster and adhesive manufacturers’ instructions.
Do not coat the wall with ordinary PVA unless the tile adhesive manufacturer specifically requires it. PVA can soften when exposed to moisture and may prevent the adhesive from bonding correctly. Use the primer specified for the complete tiling system.
Waterproof the Wet Areas
Tiles and grout create a cleanable surface, but they are not a complete waterproof barrier. Water can pass through joints, corners and small defects. Shower enclosures, wet rooms and walls around a bath with an overhead shower should have a suitable tanking or waterproofing system behind the tiles.
A typical tanking system includes:
A compatible primer
Waterproof tape for board joints and changes of direction
Preformed corner pieces where required
Pipe collars around shower and tap penetrations
A liquid or sheet waterproof membrane
Prepare and prime the background as instructed. Reinforce corners, wall joints and pipe openings before applying the main membrane. Observe the stated coverage, number of coats and drying time.
Do not combine unrelated tapes, primers and membranes unless their manufacturers confirm compatibility. A complete proprietary system makes it easier to follow one set of installation instructions.
Plan the Tile Layout
Find the Centre
Measure the width of the wall and mark its centre. Place tiles along the wall without adhesive, using spacers between them, to see where the end cuts will fall.
If the layout produces a very narrow strip at one side, move the starting position by half a tile. Aim for balanced cuts at both ends, especially on the main wall seen when entering the bathroom.
Check the Vertical Layout
Measure from the intended starting line to the ceiling or upper finishing point. Check whether the top row will become an awkward narrow strip. Adjust the starting line if a small change will produce better top and bottom cuts.
Remember to include the grout-joint width in every layout calculation.
Plan Around Fittings
Check where grout lines will meet:
Bath and shower tray edges
Shower controls and pipe outlets
Windows and niches
Basins and vanity units
External corners
Electrical fittings
A small adjustment to the starting point can prevent a pipe hole from landing on the edge of a tile or avoid a thin strip beside a window.
How to Tile a Bathroom Wall Step by Step
Step 1: Mark a Level Datum Line
Bathroom floors, baths and shower trays are not always perfectly level. Do not use them automatically as the guide for the first full row.
Use a spirit or laser level to mark a horizontal datum line. Position it approximately one tile height above the lowest point, allowing for a grout joint and the cut bottom row.
Step 2: Fix a Straight Batten
Fix a straight timber batten along the datum line. Check it carefully with the level before tightening the fixings. The batten supports the first full row and stops wet tiles slipping down the wall.
Check for pipes and cables before drilling. Do not drive fixings into an area where concealed plumbing or electrical services may run.
Step 3: Mark a Vertical Starting Line
Mark a plumb vertical line at the planned starting point. This keeps the first column straight. A small error in the first row or column becomes more obvious as the tiled area expands.
In many layouts, it is easier to begin near the centre and work towards the outside edges. Some corners or feature walls may require a different sequence, so follow the layout you planned.
Step 4: Prepare the Adhesive
Choose an adhesive suitable for the tile, tile size, background and wet-area system. Ready-mixed adhesive may suit certain smaller ceramic wall tiles. Porcelain, natural stone and many large-format tiles normally require an appropriate powdered adhesive.
If using a powdered product, measure the water accurately and mix it according to the instructions. Allow it to stand for the stated time, then remix if required. Do not add extra water once the adhesive has started setting.
Step 5: Apply Adhesive to a Small Area
Spread adhesive over a manageable area with the flat side of the trowel. Comb it with the notched edge to form straight, parallel ridges.
Do not cover the entire wall at once. Adhesive can form a surface skin before the tiles are installed, weakening the bond. If you touch a ridge and the adhesive no longer transfers to your finger, remove it and apply fresh material.
Step 6: Install the First Tile
Place the first tile at the intersection of the horizontal batten and vertical guide. Press it into the adhesive with a small sliding movement across the ridges.
Remove one of the first tiles to check the adhesive contact on its back. The required coverage depends on the tile and location, but wet areas need thorough, even support without significant voids where moisture could collect.
Large or deeply profiled tiles may require a thin layer of adhesive on the back as well as combed adhesive on the wall. Follow the adhesive and tile instructions.
Step 7: Add Spacers and Continue the Row
Place spacers between the tiles and continue along the batten. Check the tile faces with a straight edge and confirm the row remains level.
Do not push adhesive into the full depth of the joints. Remove excess while it is still soft so there is enough room for grout later.
Check the work frequently rather than waiting until the wall is covered. Minor adjustments are easier while the adhesive remains workable.
Step 8: Build the Remaining Rows
Continue upwards in small sections. Use the spirit level to check horizontal rows and vertical joints. Step back regularly to inspect the overall pattern.
Tile levelling clips can help reduce uneven edges between larger tiles, but they cannot correct a wall that was not made flat before installation.
Step 9: Fit Tile Trim
Install compatible tile trim wherever an exposed external edge needs protection. Cut the trim cleanly and bed its perforated fixing leg into the adhesive before installing the final tiles over it.
Select a trim depth that matches the combined tile and adhesive thickness. A trim that is too shallow leaves the tile edge exposed, while an excessively deep trim can sit proud of the finished face.
Check the Cost of Bathroom Tiling
Compare current UK bathroom renovation and wall-tiling costs before buying materials or accepting a professional quote.
Calculate Bathroom Renovation Cost
How to Cut Bathroom Wall Tiles
Straight Cuts
Measure the available space and subtract the grout joint and perimeter movement gap. Mark the tile clearly. A manual score-and-snap cutter is suitable for many straight cuts in ceramic and some porcelain tiles.
Score the tile once with steady pressure and snap it along the scored line. Repeated scoring can chip the glaze and produce an uneven break.
Curved and Detailed Cuts
A wet tile saw or suitable diamond tool may be required for porcelain, natural stone and narrow cuts. Smooth sharp cut edges with a tile file or rubbing stone where appropriate.
Do not place a factory-cut edge beside a polished external trim if the cut will remain visible. Plan the layout so factory edges face the most noticeable positions.
Holes for Pipes
Measure the pipe position from two fixed tile edges and transfer the measurements to the tile. Drill the opening with a diamond hole saw intended for the tile material.
Support the tile on a stable surface and start the drill carefully so the bit does not wander. Make the hole large enough for the required clearance and waterproof pipe collar, but small enough to be covered by the fitting’s trim plate.
Tile Around a Bath or Shower Tray
The bath or shower tray should be secure and level before the bottom tile cuts are measured. Do not allow the tiles to rest directly on its edge. Leave the movement gap specified by the tiling system and use temporary spacers while the adhesive cures.
After the main wall has set, remove the batten and install the cut bottom row. Keep the joint above the bath or tray consistent. This joint should normally be sealed with suitable sanitary silicone rather than rigid grout because the surfaces can move independently.
Where a bath may flex under use, follow the bath and sealant manufacturers’ guidance. Some installations require the bath to be filled before the final silicone joint is applied so the seal is formed while the bath carries its normal load.
Allow the Adhesive to Cure
Wait for the full curing time stated by the adhesive manufacturer before removing the batten or applying grout. Temperature, ventilation, tile material and the wall background can affect the drying time.
Do not use the shower or expose the wall to heavy moisture while the adhesive, grout or silicone is curing.
How to Grout Bathroom Wall Tiles
Remove the spacers and scrape out adhesive that has entered the joints.
Vacuum or brush away loose material without damaging the tile edges.
Mix the grout according to its instructions.
Use a rubber grout float to press grout firmly into the joints.
Work diagonally across the tiles so the float does not pull grout back out.
Remove the initial excess with the edge of the float.
When the grout reaches the stated cleaning stage, wipe the tiles with a damp sponge.
Rinse the sponge regularly and avoid using excessive water.
After the grout has firmed, polish away the remaining haze with a clean cloth.
Do not grout internal corners, wall-to-floor joints or the connection between the tiles and bath or shower tray. These are movement joints and should normally receive a compatible flexible sealant.
Seal the Corners and Edges
Allow the tiled surface and movement joints to dry. Apply masking tape if needed to create straight silicone edges. Fill the joint with sanitary bathroom silicone and tool it before a skin forms.
Remove the masking tape immediately after tooling. Allow the silicone to cure for the full stated period before using the bath or shower.
How Much Does Bathroom Wall Tiling Cost?
According to InstantCost’s current 2026 UK bathroom tiling data, professional bathroom wall tiling typically costs:
Bathroom tiling work | Typical UK cost |
|---|---|
Wall tiling, supply and installation | £25 to £90 per square metre |
Tiling labour only | £30 to £70 per square metre |
Professional tiler | £150 to £250 per day |
Standard bathroom walls | £750 to £1,600 |
Wet-area tanking system | £200 to £400 |
Removing old wall tiles | £10 to £20 per square metre |
Material, tile size, pattern, preparation and the number of detailed cuts can change the final price. Large-format porcelain, natural stone, mosaics, shower niches and uneven walls generally require more time and specialist tools.
For a wider breakdown covering walls, floors, materials and preparation, see the InstantCost guide explaining how much it costs to tile a bathroom.
Bathroom Wall Tiling Safety
Wear eye protection when cutting or drilling tiles. Broken ceramic and porcelain edges can be extremely sharp, so handle offcuts with gloves and dispose of them in a rigid container.
Cutting tiles with powered tools can produce hazardous dust, including respirable crystalline silica in some materials. Use wet cutting or suitable extraction, work in a controlled area and wear respiratory protection appropriate for the task. The Health and Safety Executive guidance on controlling silica dust while cutting explains why uncontrolled powered cutting creates a serious exposure risk.
Keep electrical tools and extension connections away from water. Use equipment suitable for the working environment and protect the circuit with an appropriate residual current device.
Isolate the electrical supply before removing the covers from switches, shaver sockets or other fittings. Bathroom electrical work is subject to strict requirements because it is carried out in a special location. Use a qualified electrician if wiring, circuits or fixed fittings need to be altered.
Check for concealed pipes and cables before drilling battens or tile accessories into the wall.
Common Bathroom Wall Tiling Mistakes
Tiling Over an Uneven Wall
A thick bed of adhesive does not reliably correct a badly uneven background. Flatten and repair the wall before starting.
Assuming Tiles and Grout Are Waterproof
Water can reach the background through joints and movement points. Tank shower areas and other regularly wet surfaces before installing tiles.
Starting From an Uneven Bath or Floor
An uneven first row makes every row above it look crooked. Establish a level datum line and support the first full row with a straight batten.
Finishing With Narrow Tile Strips
Dry-plan the layout before mixing adhesive. Moving the centre line by half a tile can create wider, more balanced cuts.
Spreading Too Much Adhesive
Adhesive that has formed a skin will not bond properly. Work in sections that you can cover within the product’s open time.
Using Grout in Movement Joints
Grout can crack where two walls meet or where tiles meet a bath or shower tray. Use the flexible sealant specified for these junctions.
Using the Bathroom Too Soon
Water can weaken uncured adhesive, grout and silicone. Follow each manufacturer’s curing time before using the bath or shower.
Frequently Asked Questions
Where should I start when tiling a bathroom wall?
Plan the tile positions from the centre of the main wall, then begin the first full row from a level batten. This provides a straight foundation even when the bath, shower tray or floor is slightly uneven.
Do bathroom walls need waterproofing before tiling?
Walls exposed to regular direct water, including shower enclosures and bath surrounds with an overhead shower, should have a compatible waterproofing or tanking system. Tiles, adhesive and grout alone do not form a complete waterproof barrier.
Can I tile directly onto plasterboard?
Tiles can be fixed to suitable sound plasterboard in some dry or lightly exposed areas if the tile weight and adhesive system are compatible. Shower and other wet areas need an appropriate waterproofing system, and damaged or unsuitable boards should be replaced.
Can I tile directly onto fresh plaster?
Fresh plaster must dry completely and may need a compatible primer before tiling. Follow the plaster and adhesive manufacturers’ requirements. Do not use ordinary PVA unless the specified system expressly permits it.
Should I tile behind a bath?
The wall around a bath should be prepared and waterproofed according to the bathroom design. Whether tiles continue fully behind the bath depends on the installation sequence and specification. The critical detail is a secure bath and a continuous waterproof system at the wall and bath junction.
How long should bathroom wall tiles dry before grouting?
Use the curing period stated by the adhesive manufacturer. Many products require at least a full day, but non-porous tiles, cool conditions and certain backgrounds can increase the time. Do not judge readiness only by the exposed adhesive at the tile edges.
Plan Your Bathroom Tiling Budget
Select your bathroom size, tiling requirements and location to receive a current UK cost estimate.